Use Managed Better Auth with Next.js (API methods)
This guide shows you how to integrate Managed Better Auth into a Next.js (App Router) project using SDK methods directly. For pre built UI components, see the UI components reference and the neon js e...
This guide shows you how to integrate Managed Better Auth into a Next.js (App Router) project using SDK methods directly. For pre-built UI components, see the UI components reference and the neon-js examples. Upgrading from v0.1? See the migration guide.
Enable Auth in your Neon project
If you don't have a Neon project yet, create one at console.neon.tech.
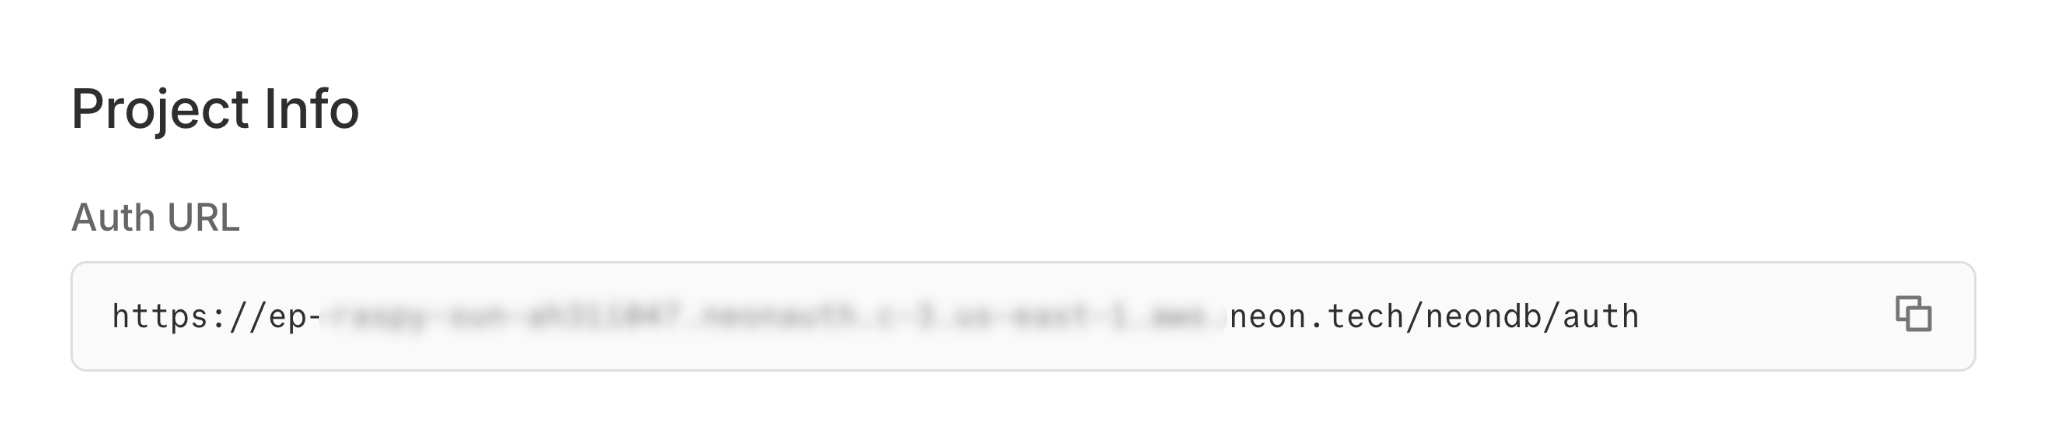
Go to the Auth page in your project dashboard and click Enable Auth, then copy your Auth URL from the Configuration tab.
Console path: Project → Branch → Auth → Configuration
Console
Install the Neon SDK
Install the Neon SDK into your Next.js app.
If you don't have a Next.js project
Bash npx create-next-app@latest my-app --yes cd my-appBash npm install @neondatabase/auth@latestSet up environment variables
Create a
.env.localfile in your project root and add your Auth URL and a cookie secret:.env.local NEON_AUTH_BASE_URL=https://ep-xxx.neonauth.us-east-1.aws.neon.tech/neondb/auth NEON_AUTH_COOKIE_SECRET=your-secret-at-least-32-characters-longCreate auth server instance
Create a unified auth instance in
lib/auth/server.ts. This single instance provides all server-side auth functionality:.handler()for API routes.middleware()for route protection.getSession()and all Better Auth server methods
See the Next.js Server SDK reference for complete API documentation (logging, cookies, upstream errors).
lib/auth/server.ts import { createNeonAuth } from '@neondatabase/auth/next/server'; export const auth = createNeonAuth({ baseUrl: process.env.NEON_AUTH_BASE_URL!, cookies: { secret: process.env.NEON_AUTH_COOKIE_SECRET!, // sessionDataTtl: 300, // optional session_data cache TTL in seconds (default: 300) }, // logLevel: 'silent', // disable Managed Better Auth logging // logLevel: 'debug', // verbose proxy/upstream logging });Set up auth API routes
Create an API route handler that proxies auth requests. All Managed Better Auth APIs will be routed through this handler. Create a route file inside
/api/auth/[...path]directory:app/api/auth/[...path]/route.ts app/api/auth/[...path]/route.ts import { auth } from '@/lib/auth/server'; export const { GET, POST } = auth.handler();Add authentication middleware
The middleware ensures users are authenticated before accessing protected routes. Create
proxy.tsfile in your project root:proxy.ts import { auth } from '@/lib/auth/server'; export default auth.middleware({ // Redirects unauthenticated users to sign-in page loginUrl: '/auth/sign-in', }); export const config = { matcher: [ // Protected routes requiring authentication '/account/:path*', ], };Configure the auth client
Create the auth client in
lib/auth/client.tsfor client-side auth operations (form submissions, hooks, etc.).lib/auth/client.ts 'use client'; import { createAuthClient } from '@neondatabase/auth/next'; export const authClient = createAuthClient();Create Sign up form
Lets create a sign-up form and action in
app/auth/sign-up/page.tsxandapp/auth/sign-up/actions.tsfiles respectively using the auth instance we created in previous step- To create user with email and password, we will use
auth.signUp.email()with user name, email address, and password - You can optionally add business logic before invoking the API, for example restrict signups to emails ending with
@my-company.com
Copy and paste following code in
app/auth/sign-up/actions.tsfile:TypeScript 'use server'; import { auth } from '@/lib/auth/server'; import { redirect } from 'next/navigation'; export async function signUpWithEmail( _prevState: { error: string } | null, formData: FormData ) { const email = formData.get('email') as string; if (!email) { return { error: "Email address must be provided." } } // Optionally restrict sign ups based on email address // if (!email.trim().endsWith("@my-company.com")) { // return { error: 'Email must be from my-company.com' }; // } const { error } = await auth.signUp.email({ email, name: formData.get('name') as string, password: formData.get('password') as string, }); if (error) { return { error: error.message || 'Failed to create account' }; } redirect('/'); }Copy and paste following code in
app/auth/sign-up/page.tsxfile:TSX 'use client'; import { useActionState } from 'react'; import { signUpWithEmail } from './actions'; export default function SignUpForm() { const [state, formAction, isPending] = useActionState(signUpWithEmail, null); return ( <form action={formAction} className="flex flex-col gap-5 min-h-screen items-center justify-center bg-gray-900"> <div className="w-sm"> <h1 className="mt-10 text-center text-2xl/9 font-bold text-white">Create new account</h1> </div> <div className='flex flex-col gap-1.5 w-sm'> <label htmlFor="name" className="block text-sm font-medium text-gray-100">Name</label> <input id="name" name="name" type="text" required placeholder="John Doe" className="block rounded-md w-full bg-white/5 px-2 py-1.5 placeholder:text-gray-500 text-white outline-1 outline-white/10 focus:outline-indigo-500" /> </div> <div className='flex flex-col gap-1.5 w-sm'> <label htmlFor="email" className="block text-sm font-medium text-gray-100">Email address</label> <input id="email" name="email" type="email" required placeholder="john@my-company.com" className="block rounded-md w-full bg-white/5 px-2 py-1.5 placeholder:text-gray-500 text-white outline-1 outline-white/10 focus:outline-indigo-500"/> </div> <div className='flex flex-col gap-1.5 w-sm'> <label htmlFor="password" className="block text-sm font-medium text-gray-100">Password</label> <input id="password" name="password" type="password" required placeholder="*****" className="block rounded-md w-full bg-white/5 px-2 py-1.5 placeholder:text-gray-500 text-white outline-1 outline-white/10 focus:outline-indigo-500"/> </div> {state?.error && ( <div className="rounded-md px-3 py-2 text-sm text-red-500"> {state.error} </div> )} <button type="submit" disabled={isPending} className="flex w-sm justify-center rounded-md bg-indigo-500 px-3 py-1.5 text-sm/6 font-semibold text-white hover:bg-indigo-400"> {isPending ? 'Creating account...' : 'Create Account'} </button> </form> ); }- To create user with email and password, we will use
Create Sign in form
Lets create a sign-in form and action in
app/auth/sign-in/page.tsxandapp/auth/sign-in/actions.tsfiles respectively.- To sign-in the user we will use
auth.signIn.email()with user's email address and password.
Sign In
Sign-in action 'use server'; import { auth } from '@/lib/auth/server'; import { redirect } from 'next/navigation'; export async function signInWithEmail( _prevState: { error: string } | null, formData: FormData ) { const { error } = await auth.signIn.email({ email: formData.get('email') as string, password: formData.get('password') as string, }); if (error) { return { error: error.message || 'Failed to sign in. Try again' }; } redirect('/'); }Sign-in form 'use client'; import { useActionState } from 'react'; import { signInWithEmail } from './actions'; export default function SignInForm() { const [state, formAction, isPending] = useActionState(signInWithEmail, null); return ( <form action={formAction} className="flex flex-col gap-5 min-h-screen items-center justify-center bg-gray-900"> <div className="w-sm"> <h1 className="mt-10 text-center text-2xl/9 font-bold text-white">Sign in to your account</h1> </div> <div className='flex flex-col gap-1.5 w-sm'> <label htmlFor="email" className="block text-sm font-medium text-gray-100">Email address</label> <input id="email" name="email" type="email" required placeholder="john@my-company.com" className="block rounded-md w-full bg-white/5 px-2 py-1.5 placeholder:text-gray-500 text-white outline-1 outline-white/10 focus:outline-indigo-500"/> </div> <div className='flex flex-col gap-1.5 w-sm'> <label htmlFor="password" className="block text-sm font-medium text-gray-100">Password</label> <input id="password" name="password" type="password" required placeholder="*****" className="block rounded-md w-full bg-white/5 px-2 py-1.5 placeholder:text-gray-500 text-white outline-1 outline-white/10 focus:outline-indigo-500"/> </div> {state?.error && ( <div className="rounded-md px-3 py-2 text-sm text-red-500"> {state.error} </div> )} <button type="submit" disabled={isPending} className="flex w-sm justify-center rounded-md bg-indigo-500 px-3 py-1.5 text-sm/6 font-semibold text-white hover:bg-indigo-400"> Sign in </button> </form> ); }- To sign-in the user we will use
Create home page
In last step, lets create the home page and display authenticated user status:
app/page.tsx import { auth } from '@/lib/auth/server'; import Link from 'next/link'; // Server components using auth methods must be rendered dynamically export const dynamic = 'force-dynamic'; export default async function Home() { const { data: session } = await auth.getSession(); if (session?.user) { return ( <div className="flex flex-col gap-2 min-h-screen items-center justify-center bg-gray-900"> <h1 className="mb-4 text-4xl"> Logged in as <span className="font-bold underline">{session.user.name}</span> </h1> </div> ); } return ( <div className="flex flex-col gap-2 min-h-screen items-center justify-center bg-gray-900"> <h1 className="mb-4 text-4xl font-bold">Not logged in</h1> <div className="flex item-center gap-2"> <Link href="/auth/sign-up" className="inline-flex text-lg text-indigo-400 hover:underline" > Sign-up </Link> <Link href="/auth/sign-in" className="inline-flex text-lg text-indigo-400 hover:underline" > Sign-in </Link> </div> </div> ); }Start your app
Start the development server:
Open your browser to http://localhost:3000 and test sign-up and sign-in.
Bash npm run dev
Available SDK methods
Section titled “Available SDK methods”Both authClient and auth expose similar API methods. Use authClient for client components and auth for server components, server actions, and API routes.
- authClient.signUp.email() /
auth.signUp.email()- Create a new user account - authClient.signIn.email() /
auth.signIn.email()- Sign in with email and password - authClient.signOut() /
auth.signOut()- Sign out the current user - authClient.getSession() /
auth.getSession()- Get the current session authClient.updateUser()/auth.updateUser()- Update user details
The auth instance also includes .handler() for API routes and .middleware() for route protection.
Next steps
Section titled “Next steps”- Next.js Server SDK reference — logging, cookie options, and upstream error codes
- Auth troubleshooting — server logging,
NETWORK_*errors, iframe cookies - Add email verification
- Branching authentication
- More example apps in the neon-js
examples/directory
Need help?
Section titled “Need help?”Join our Discord Server to ask questions or see what others are doing with Neon. For paid plan support options, see Support.