Use Managed Better Auth with TanStack Router
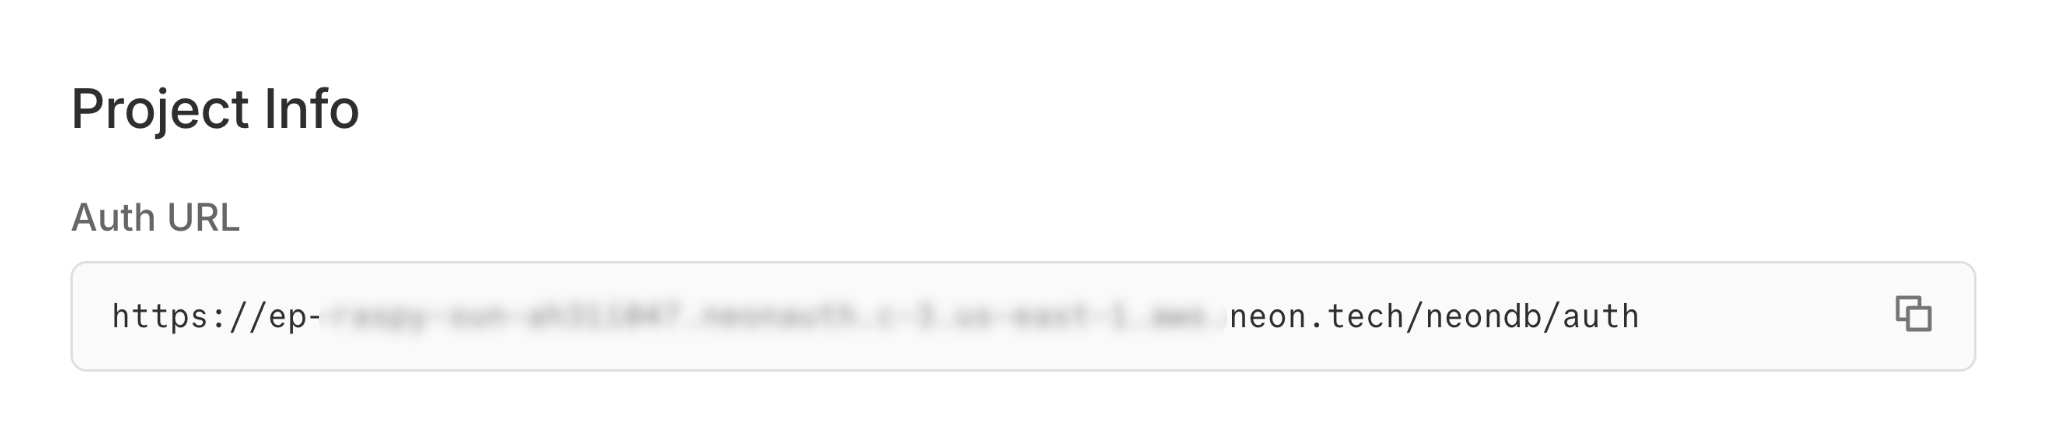
If you don't have a Neon project yet, create one at console.neon.tech. Go to the Auth page in your project dashboard and click Enable Auth. You can then find your Auth URL on the Configuration tab. Co...
Create a Neon project with Auth enabled
If you don't have a Neon project yet, create one at console.neon.tech.
Go to the Auth page in your project dashboard and click Enable Auth.
You can then find your Auth URL on the Configuration tab. Copy this URL - you'll need it in the next step.
Console
Create a TanStack Router app
Create a new TanStack Router app using the file-router template.
Bash npx create-tsrouter-app@latest my-app --template file-router --tailwindInstall the Managed Better Auth SDK
Install the Managed Better Auth SDK and UI library:
Bash cd my-app && npm install @neondatabase/neon-js@latest @neondatabase/auth-uiSet up environment variables
Create a
.envfile in your project root and add your Auth URL:.env VITE_NEON_AUTH_URL=https://ep-xxx.neonauth.us-east-1.aws.neon.tech/neondb/authAdd Managed Better Auth styles
Open your existing
src/styles.cssfile and add this import at the top, right after the Tailwind import:Add to src/styles.css @import '@neondatabase/auth-ui/tailwind';Configure the auth client
Create a
src/auth.tsfile to initialize the auth client:src/auth.ts import { createAuthClient } from '@neondatabase/neon-js/auth'; import { BetterAuthReactAdapter } from '@neondatabase/neon-js/auth/react/adapters'; // credentials: 'include' sends the session cookie on cross-origin requests. // Required if you later call authClient.token() from an origin other than your Managed Better Auth URL. export const authClient = createAuthClient(import.meta.env.VITE_NEON_AUTH_URL, { adapter: BetterAuthReactAdapter(), fetchOptions: { credentials: 'include' }, });Create the Auth Provider
Wrap your application with the
NeonAuthUIProviderinsrc/routes/__root.tsx. This makes the auth state available to the UI components used throughout your app.Pass props to
NeonAuthUIProviderfor any features you want to use. Only theauthClientprop is required.Example: Adding optional props
TSX <NeonAuthUIProvider authClient={authClient} social={{ providers: ['google', 'github', 'vercel'] }} navigate={navigate} credentials={{ forgotPassword: true }} > {children} </NeonAuthUIProvider>src/routes/__root.tsx import { Outlet, createRootRoute } from '@tanstack/react-router'; import { TanStackRouterDevtoolsPanel } from '@tanstack/react-router-devtools'; import { TanStackDevtools } from '@tanstack/react-devtools'; import { NeonAuthUIProvider } from '@neondatabase/auth-ui'; import { authClient } from '../auth'; export const Route = createRootRoute({ component: () => ( <NeonAuthUIProvider authClient={authClient}> <Outlet /> <TanStackDevtools config={{ position: 'bottom-right', }} plugins={[ { name: 'Tanstack Router', render: <TanStackRouterDevtoolsPanel />, }, ]} /> </NeonAuthUIProvider> ), });Create the Auth page
Create a route to handle authentication views (sign in, sign up, etc.). Create
src/routes/auth.$pathname.tsx:src/routes/auth.$pathname.tsx import { createFileRoute } from '@tanstack/react-router'; import { AuthView } from '@neondatabase/auth-ui'; export const Route = createFileRoute('/auth/$pathname')({ component: Auth, }); function Auth() { const { pathname } = Route.useParams(); return ( <div style={{ display: 'flex', justifyContent: 'center', alignItems: 'center', minHeight: '100vh', }} > <AuthView pathname={pathname} /> </div> ); }Create the Account page
Create a route to handle account management views. Create
src/routes/account.$pathname.tsx:src/routes/account.$pathname.tsx import { createFileRoute } from '@tanstack/react-router'; import { AccountView } from '@neondatabase/auth-ui'; export const Route = createFileRoute('/account/$pathname')({ component: Account, }); function Account() { const { pathname } = Route.useParams(); return ( <div style={{ display: 'flex', justifyContent: 'center', alignItems: 'center', minHeight: '100vh', }} > <AccountView pathname={pathname} /> </div> ); }Protect your routes
You can protect your routes using the
SignedInandRedirectToSignIncomponents. Access the user's session and profile data using theuseSessionhook.Update
src/routes/index.tsxto protect the home page:src/routes/index.tsx import { createFileRoute } from '@tanstack/react-router'; import { SignedIn, UserButton, RedirectToSignIn } from '@neondatabase/auth-ui'; import { authClient } from '@/auth'; export const Route = createFileRoute('/')({ component: Home, }); function Home() { const { data } = authClient.useSession(); return ( <> <SignedIn> <div style={{ display: 'flex', flexDirection: 'column', justifyContent: 'center', alignItems: 'center', minHeight: '100vh', gap: '2rem', }} > <div style={{ textAlign: 'center' }}> <h1>Welcome!</h1> <p>You're successfully authenticated.</p> <UserButton /> <p className="font-medium text-gray-700 dark:text-gray-200 mt-4"> Session and User Data: </p> <pre className="bg-gray-900 text-gray-100 p-4 rounded-lg text-sm overflow-x-auto whitespace-pre-wrap break-words w-full max-w-full sm:max-w-2xl mx-auto text-left"> <code> {JSON.stringify({ session: data?.session, user: data?.user }, null, 2)} </code> </pre> </div> </div> </SignedIn> <RedirectToSignIn /> </> ); }Start your app
Start the development server, then open http://localhost:3000. You'll be redirected to the sign-in page.
Bash npm run devSee your users in the database
As users sign up, their profiles are stored in your Neon database in the
neon_auth.usertable.Query your users table in the SQL Editor to see your new users:
SQL Editor SELECT * FROM neon_auth.user;
Next steps
Section titled “Next steps”- Add email verification
- Learn how to branch your auth
- More example apps in the neon-js
examples/directory