Connecting with the Neon-Managed Integration
The purpose of the Neon Managed Integration How to install it from Connectable Accounts How automated Preview Branching works How to manage environment variables and branch cleanup Vercel Managed Inte...
What you will learn:
Section titled “What you will learn:”- The purpose of the Neon-Managed Integration
- How to install it from Connectable Accounts
- How automated Preview Branching works
- How to manage environment variables and branch cleanup
Related topics
Section titled “Related topics”About this integration
Section titled “About this integration”The Neon-Managed Integration links your existing Neon project to a Vercel project while keeping billing in Neon. Instead of sharing a single database across all preview deployments, this integration creates an isolated database branch for each preview deployment.
Key features:
- One-click connection from Vercel Marketplace
- Automatic database branches for each preview deployment
- Environment variable injection (
DATABASE_URL,DATABASE_URL_UNPOOLED,PG*variables) - Automatic cleanup when branches are deleted
Who should use this integration?
Section titled “Who should use this integration?”Choose the Neon-Managed Integration if you already have a Neon account/project or prefer to manage billing directly with Neon.
Prerequisites
Section titled “Prerequisites”Before you begin, ensure you have:
- A Neon account with at least one project and database role
- A Vercel account with a project linked to GitHub, GitLab, or Bitbucket
Installation steps
Section titled “Installation steps”Connect from Neon Console
In the Neon Console, navigate to Integrations and click Add under Vercel.
Click Install from Vercel Marketplace to open the integration in Vercel.
Add the integration in Vercel
On the Vercel page, click Install.
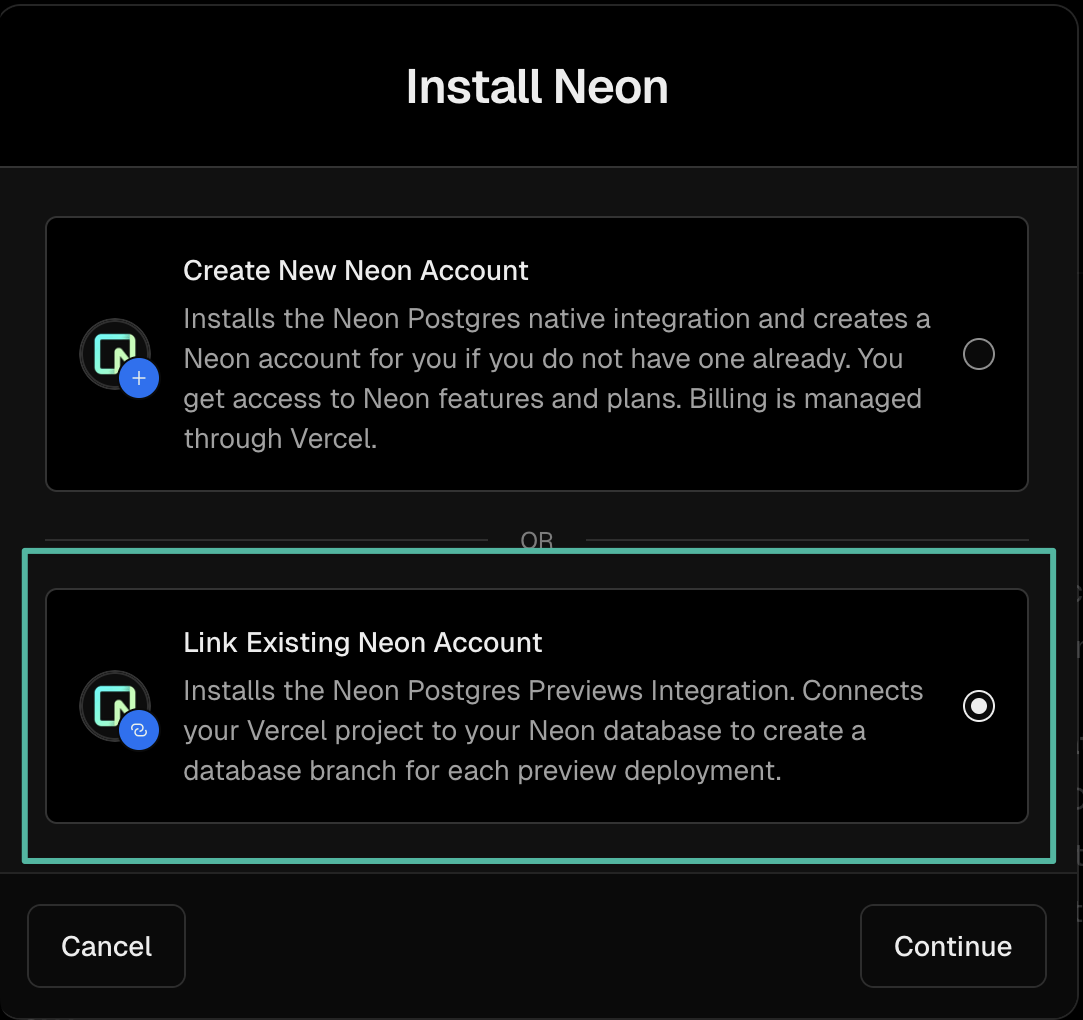
This opens the Install Neon modal where you can choose between two options. Select Link Existing Neon Account, then click Continue.
tip
Alternatively, if you're accessing this directly from the Vercel Marketplace, locate the Connectable Accounts section, find Neon, and click Add. This differs from the Native Integrations section in the Vercel Marketplace.

Configure the connection
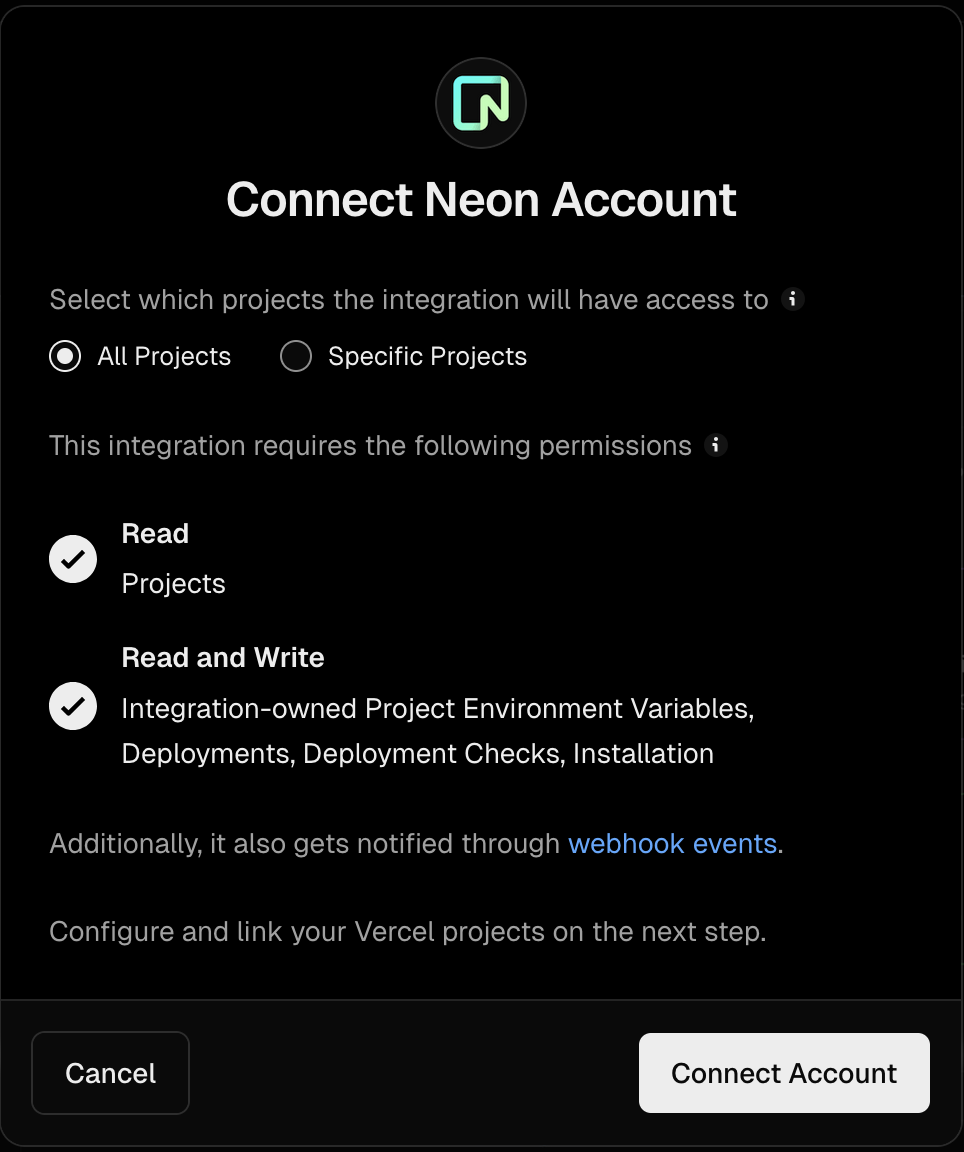
Choose which Vercel account and projects can use this integration. Each Neon project connects to exactly one Vercel project. Selecting All projects makes the integration available to other Vercel projects.
Set up project integration
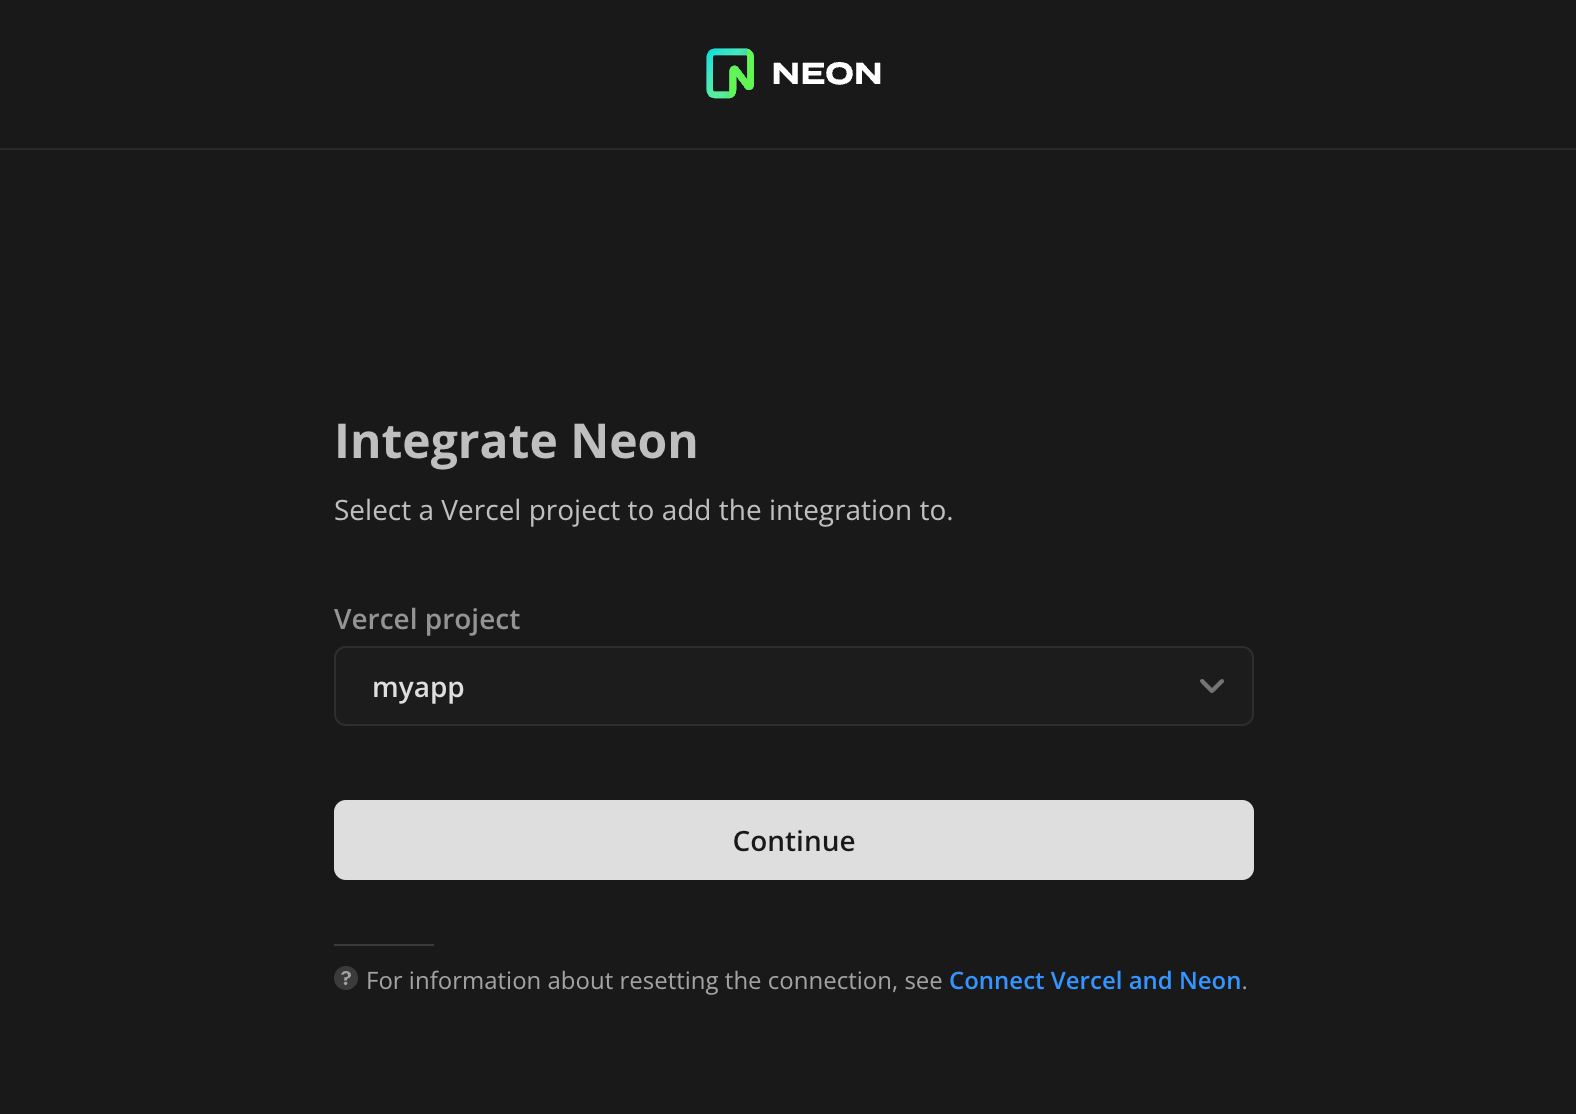
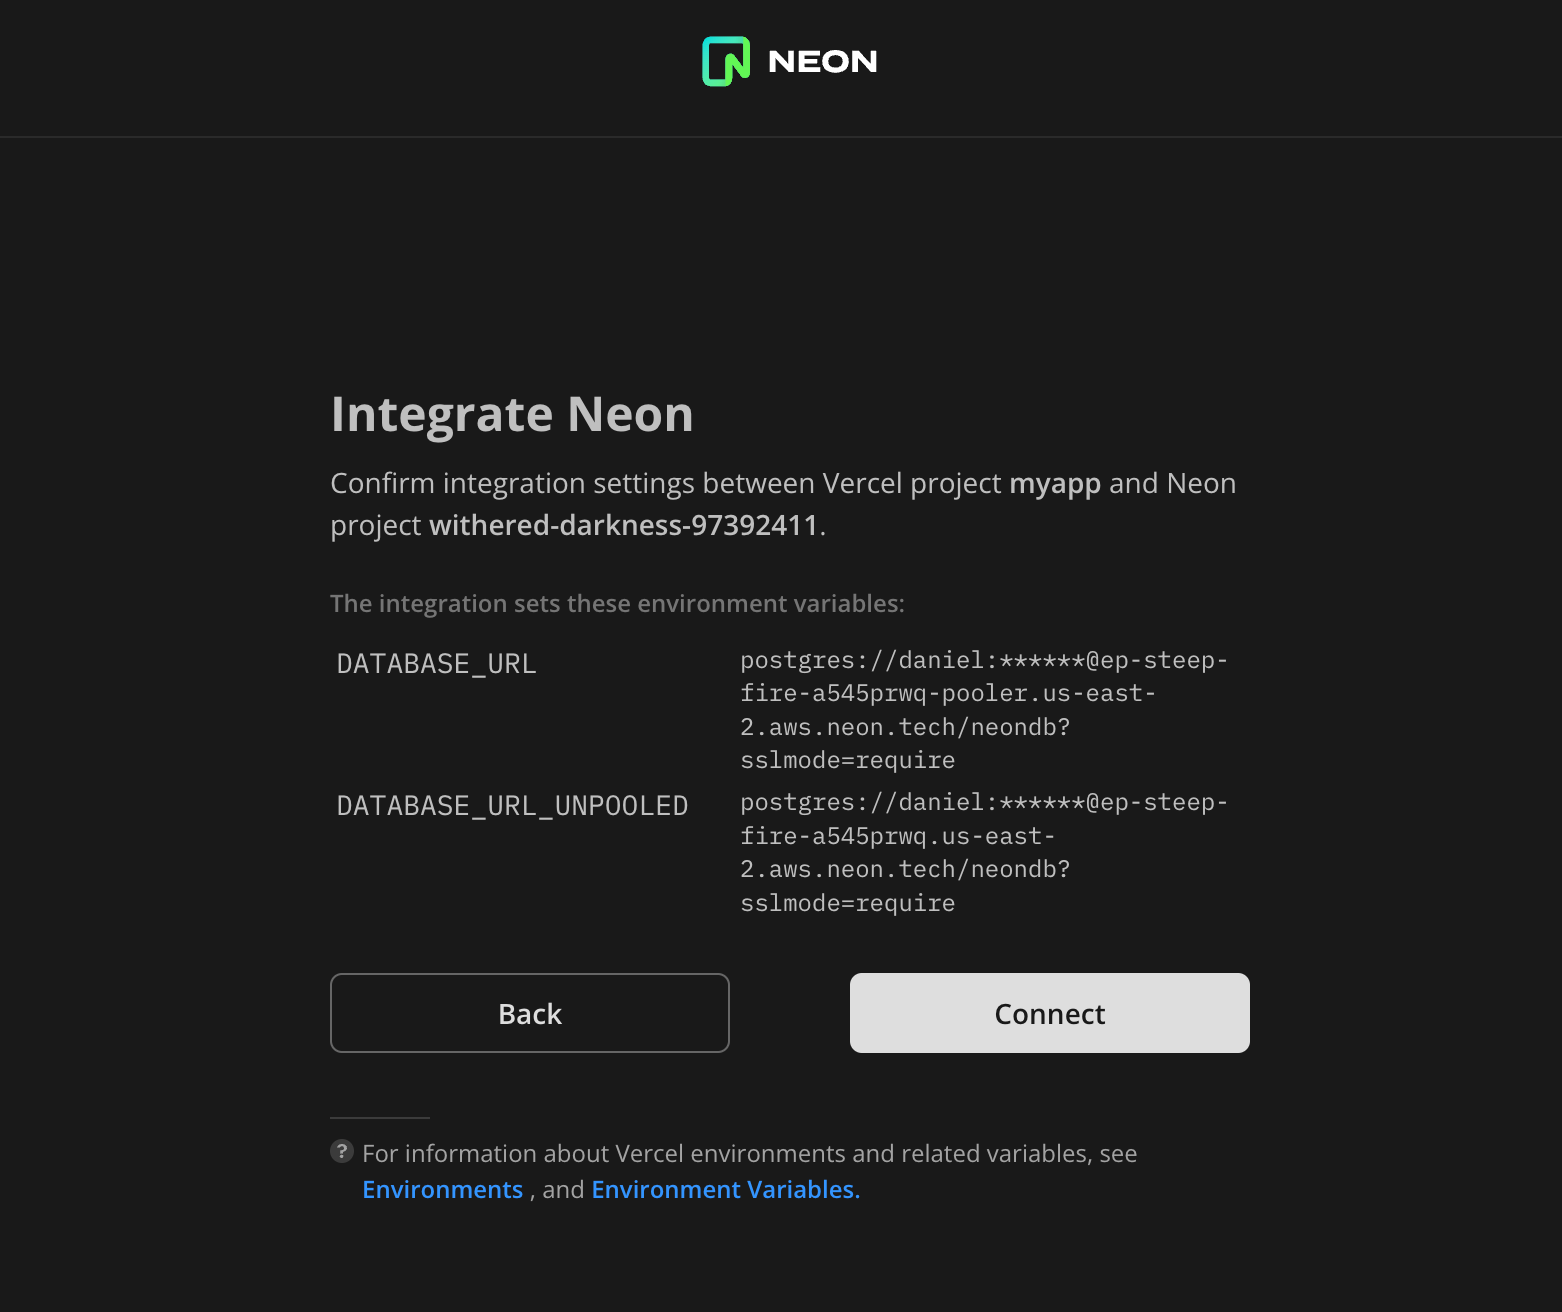
In the Integrate Neon dialog:
- Select your Vercel project
- Choose your Neon project, database, and role
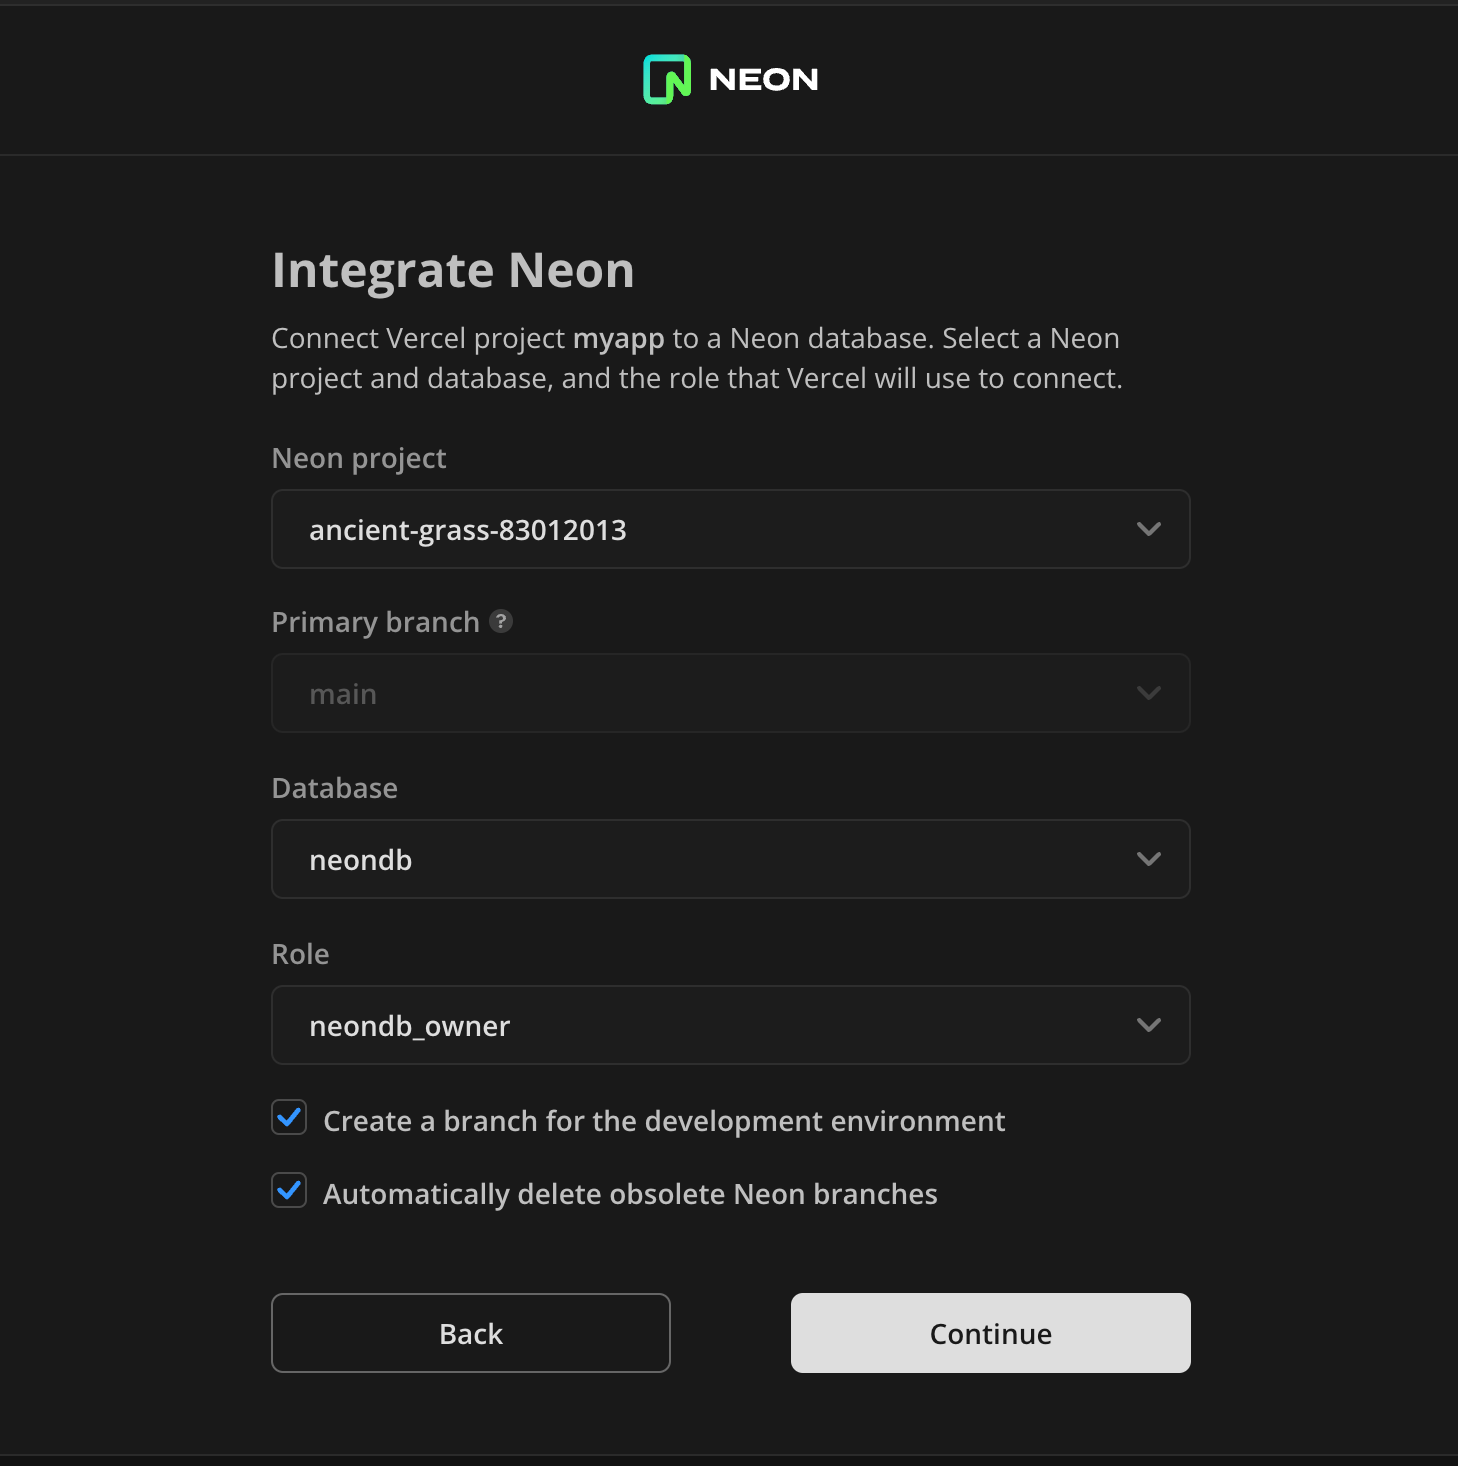
- Configure optional settings:
- Enable Create a branch for your development environment to create a persistent
vercel-devbranch and set Vercel development environment variables for it. Thevercel-devbranch is a clone of your project's default branch (main) that you can modify without affecting data on your default branch. - Enable Automatically delete obsolete Neon branches (recommended) to clean up branches when git branches are deleted.
- Enable Create a branch for your development environment to create a persistent
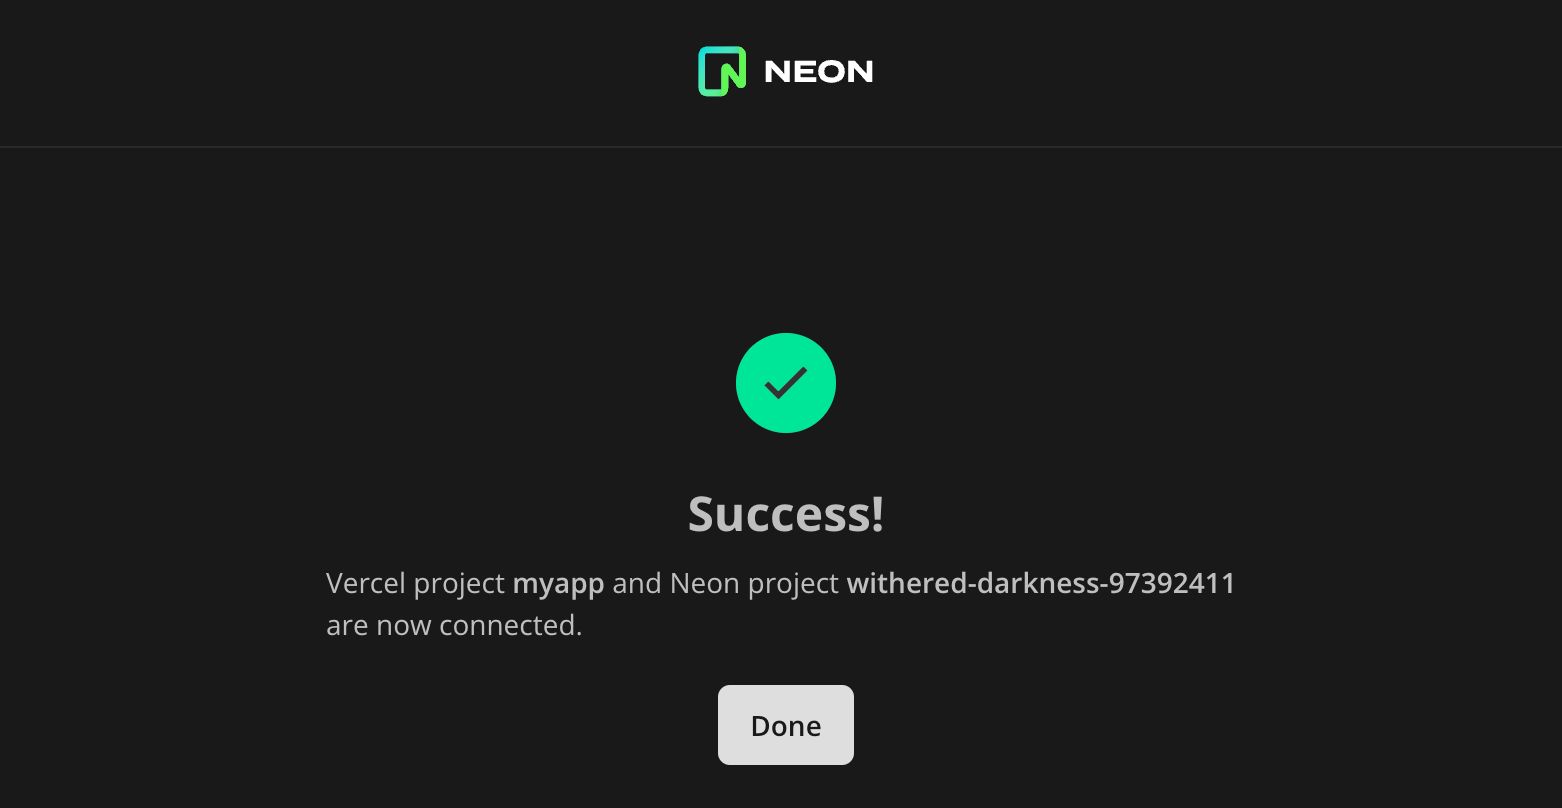
- Click Connect, then Done
- Select your Vercel project
What happens after installation
Section titled “What happens after installation”Once connected successfully, you'll see:
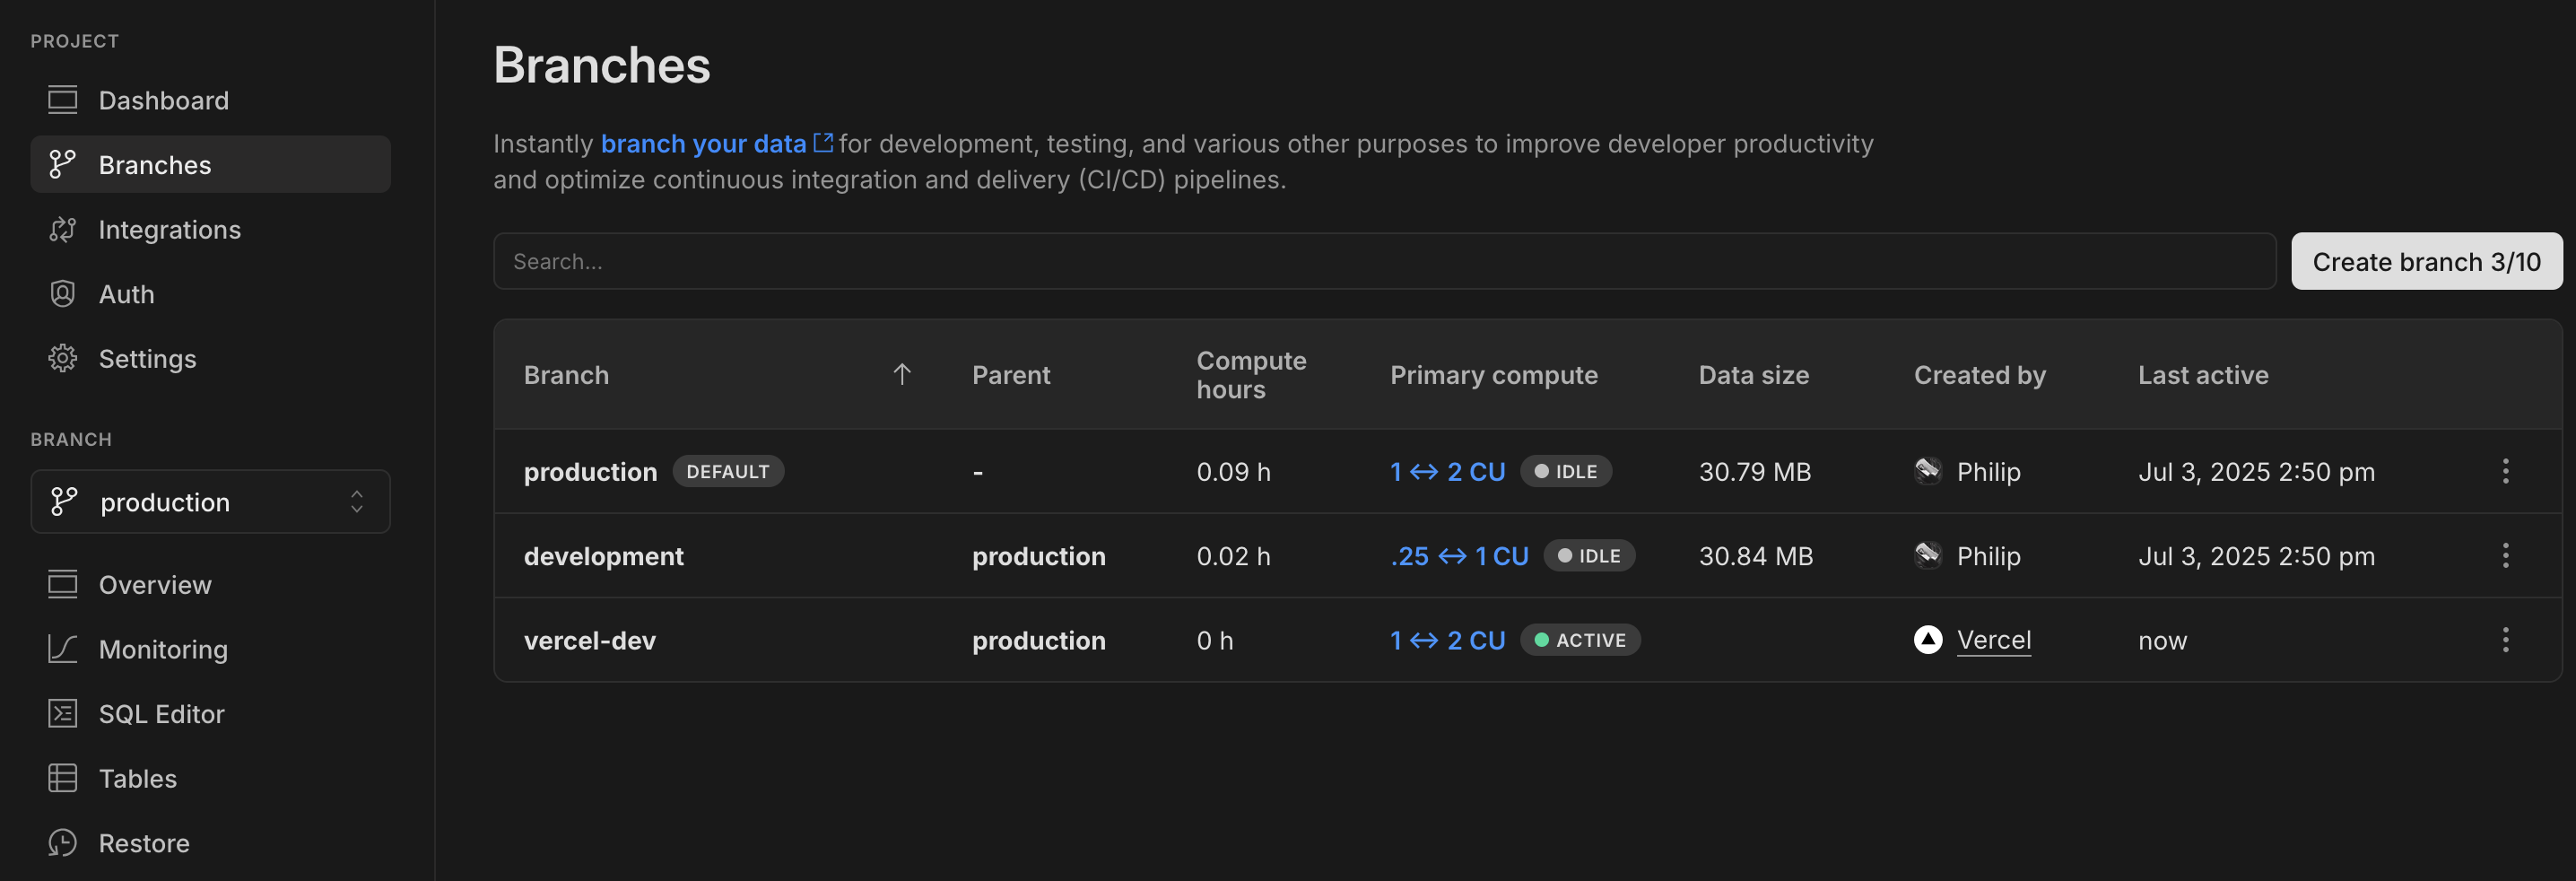
In Neon Console:
- A
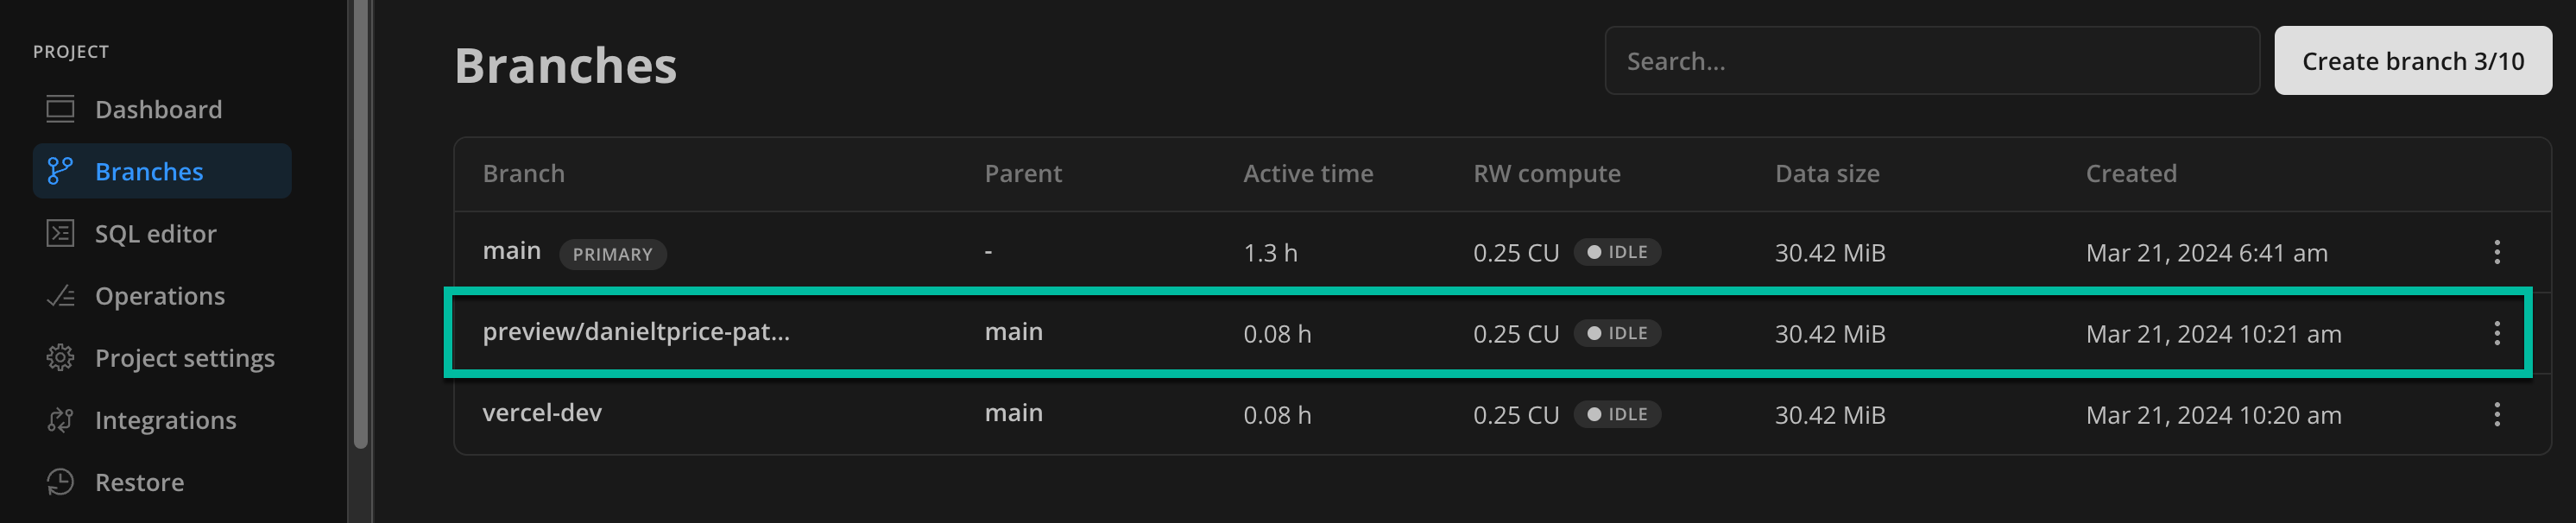
vercel-devbranch (if enabled) under Branches - Future preview branches will appear here automatically
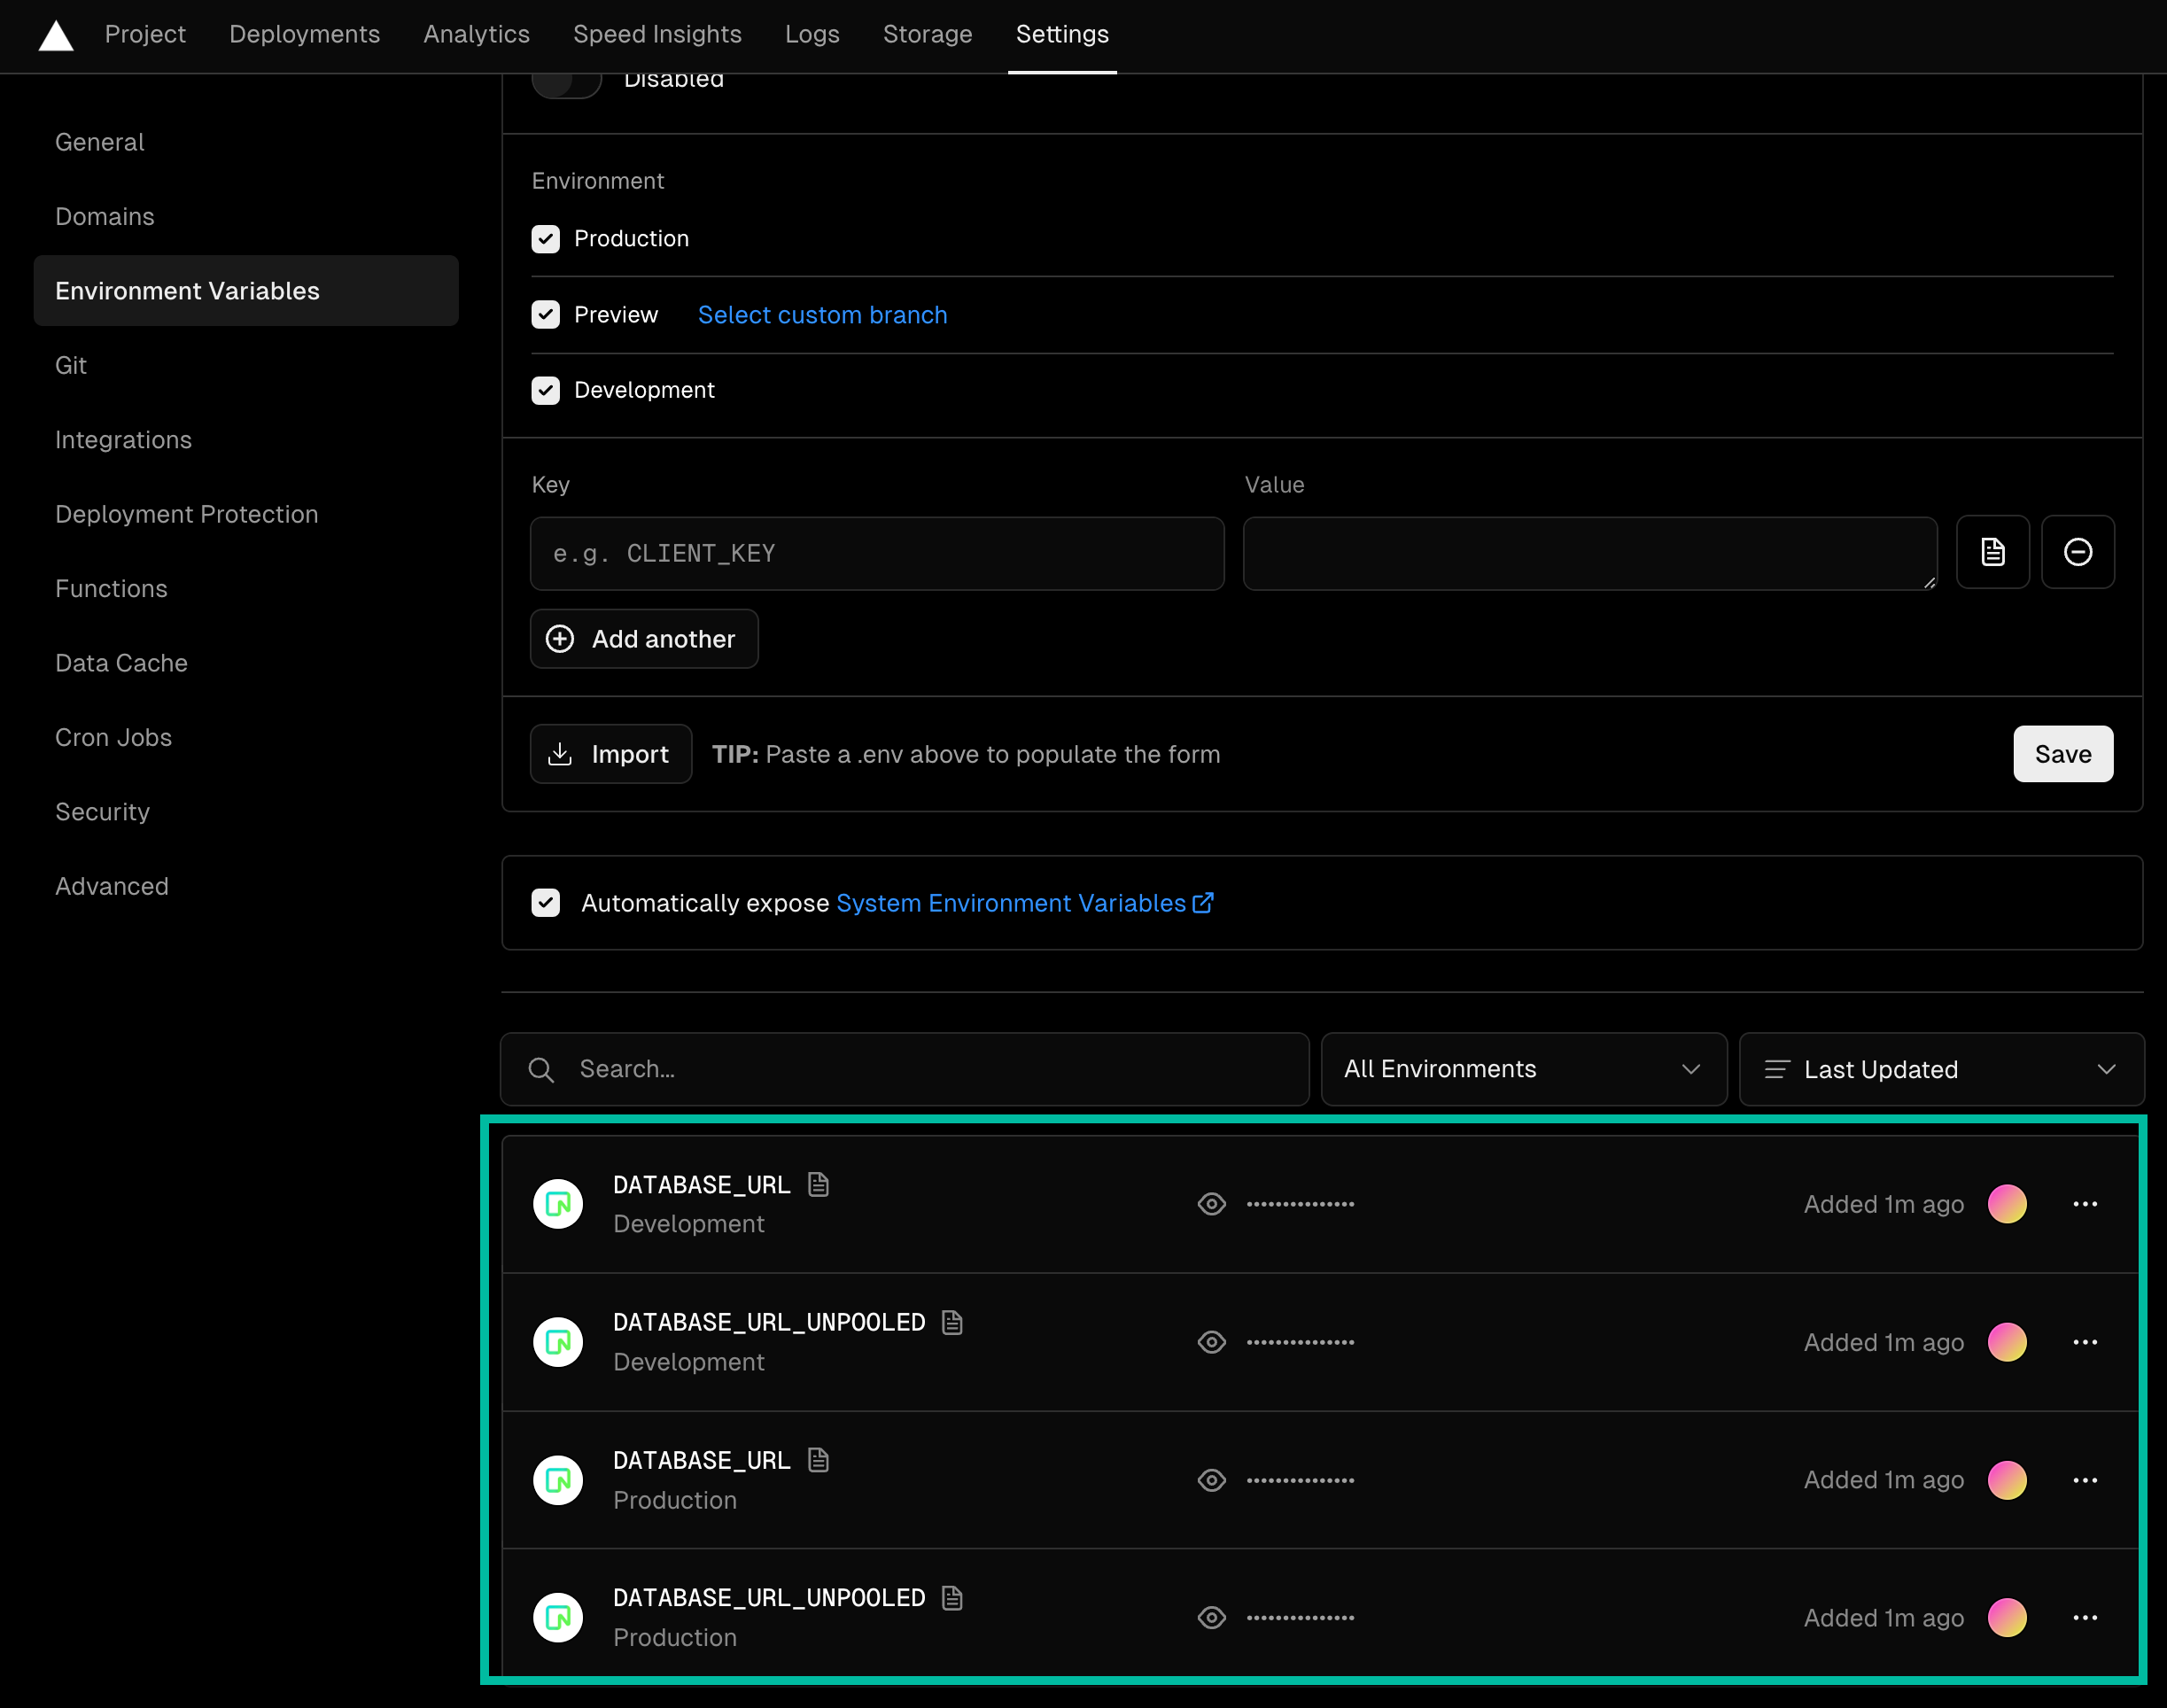
In Vercel:
DATABASE_URLand other environment variables under Settings → Environment Variables
How Preview Branching works
Section titled “How Preview Branching works”The integration automatically creates isolated database environments for each preview deployment:
Managed Better Auth support for preview deployments
Section titled “Managed Better Auth support for preview deployments”If you've enabled Managed Better Auth on your production branch, it's automatically provisioned on preview branches too. Preview deployments receive NEON_AUTH_BASE_URL and VITE_NEON_AUTH_URL environment variables, letting you test authentication in isolated environments. Auth data branches with your database, so each preview has its own independent user profiles and sessions.
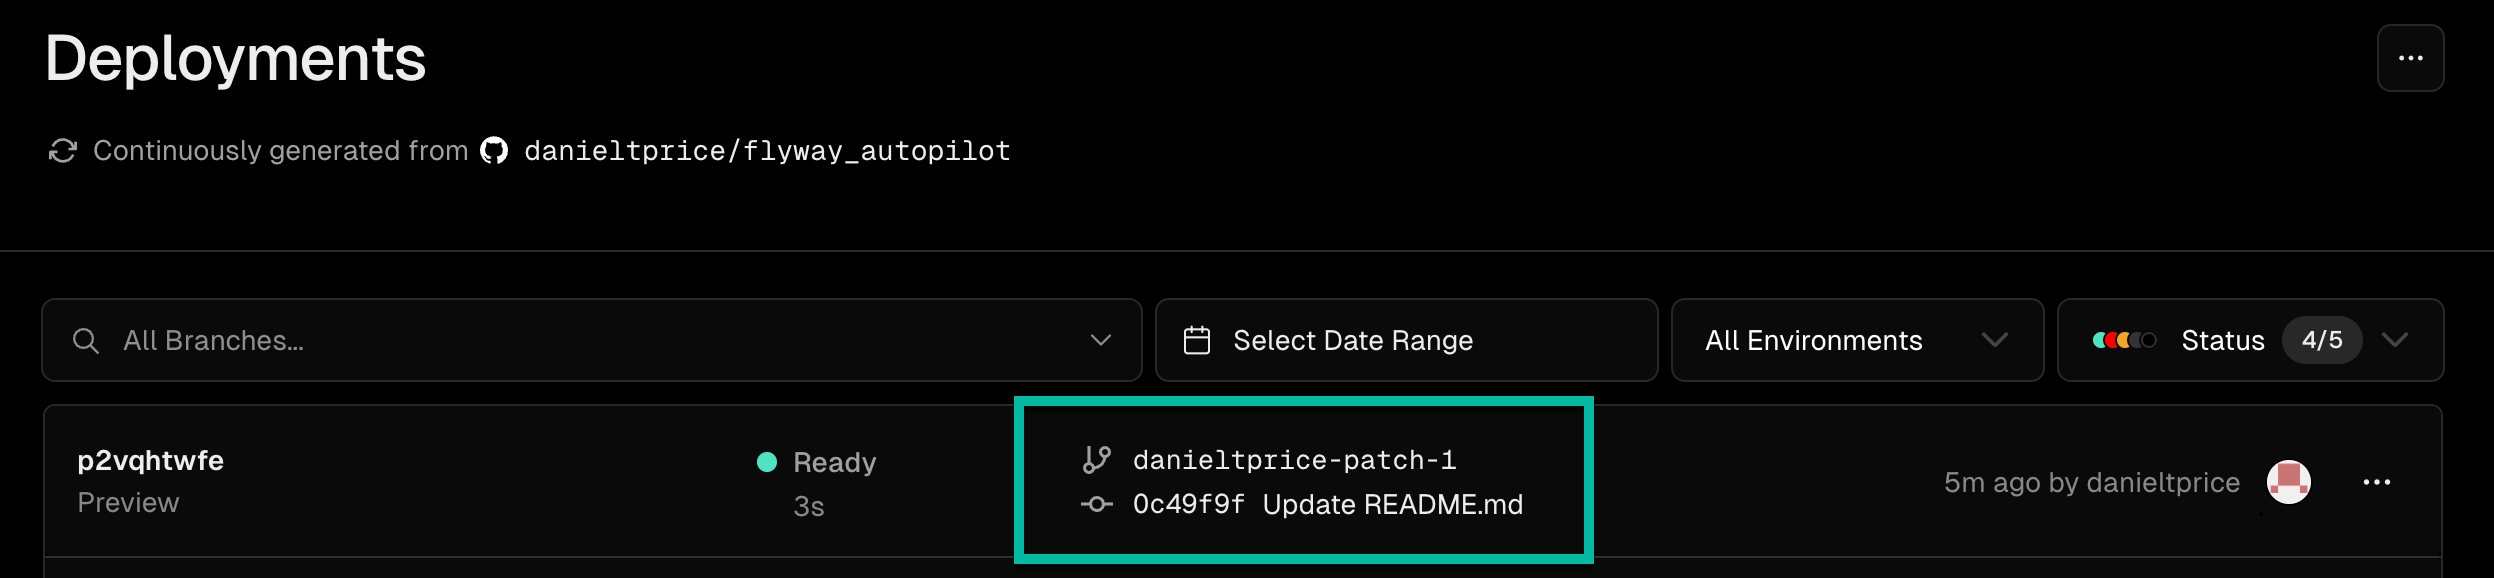
Developer pushes to feature branch
When you push commits to a feature branch, Vercel triggers a preview deployment.
Integration creates Neon branch
The integration receives a webhook from Vercel and creates a new Neon branch named
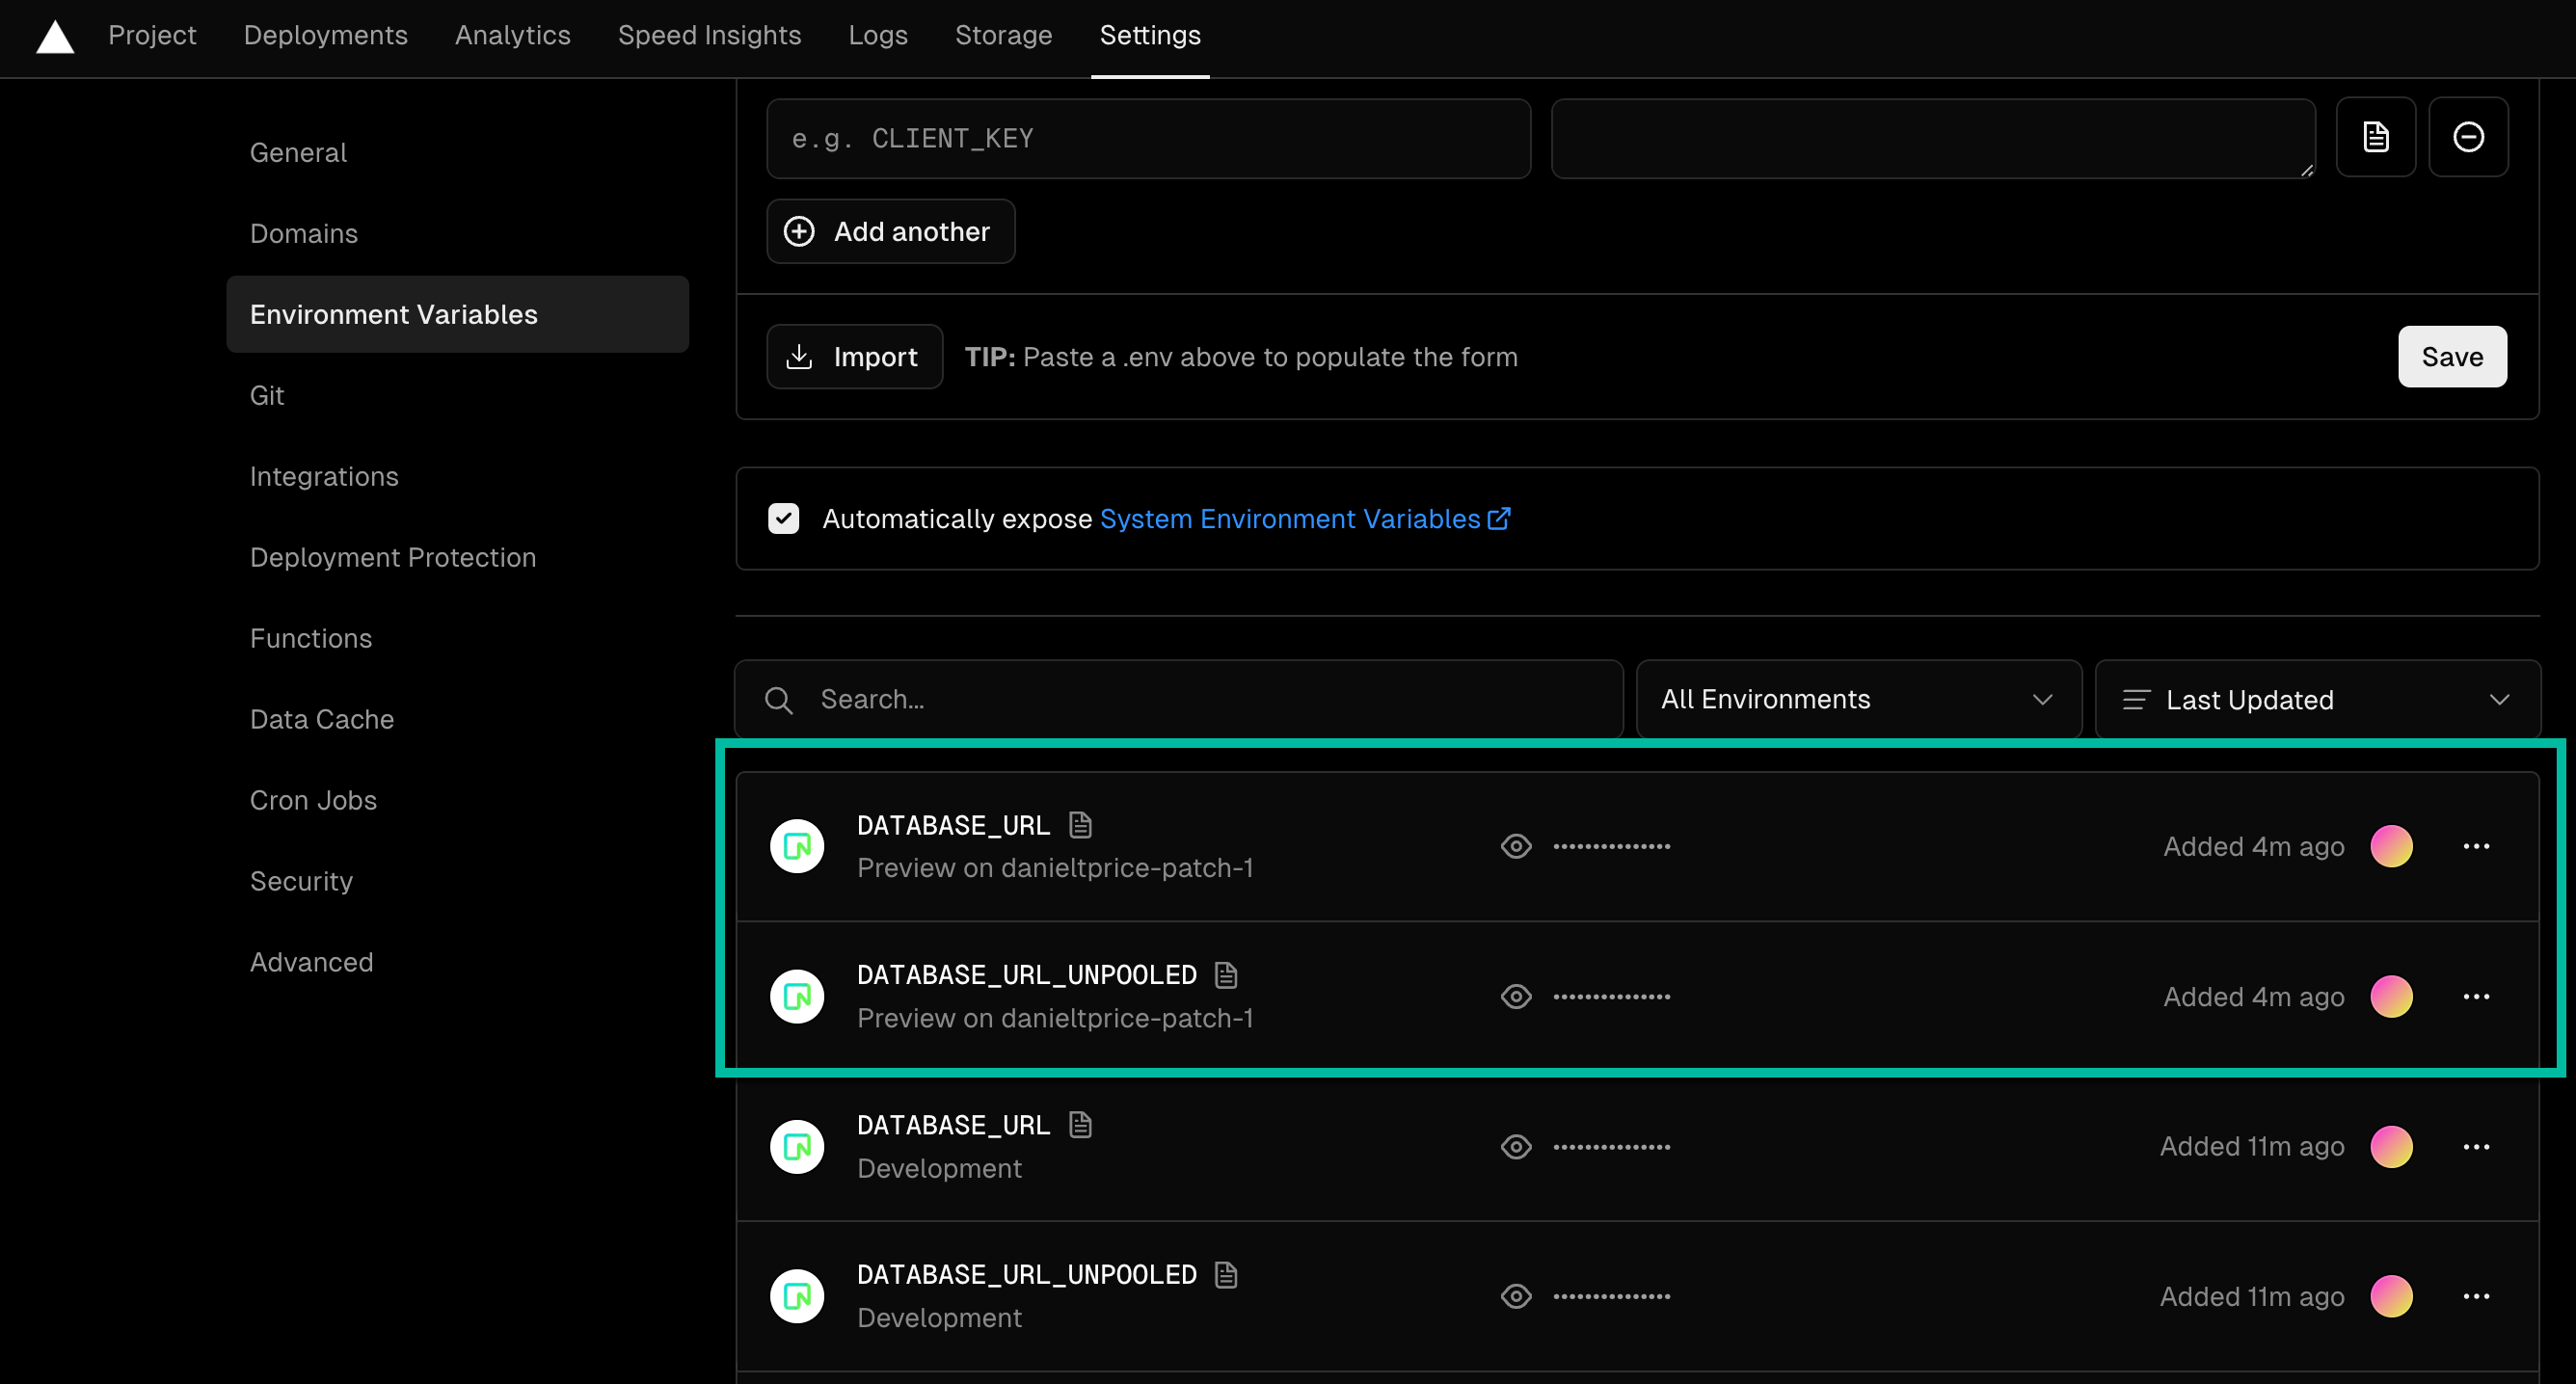
preview/<git-branch>using the Neon API.Environment variables injected
Vercel receives the new connection string and injects it as environment variables for that specific deployment only.
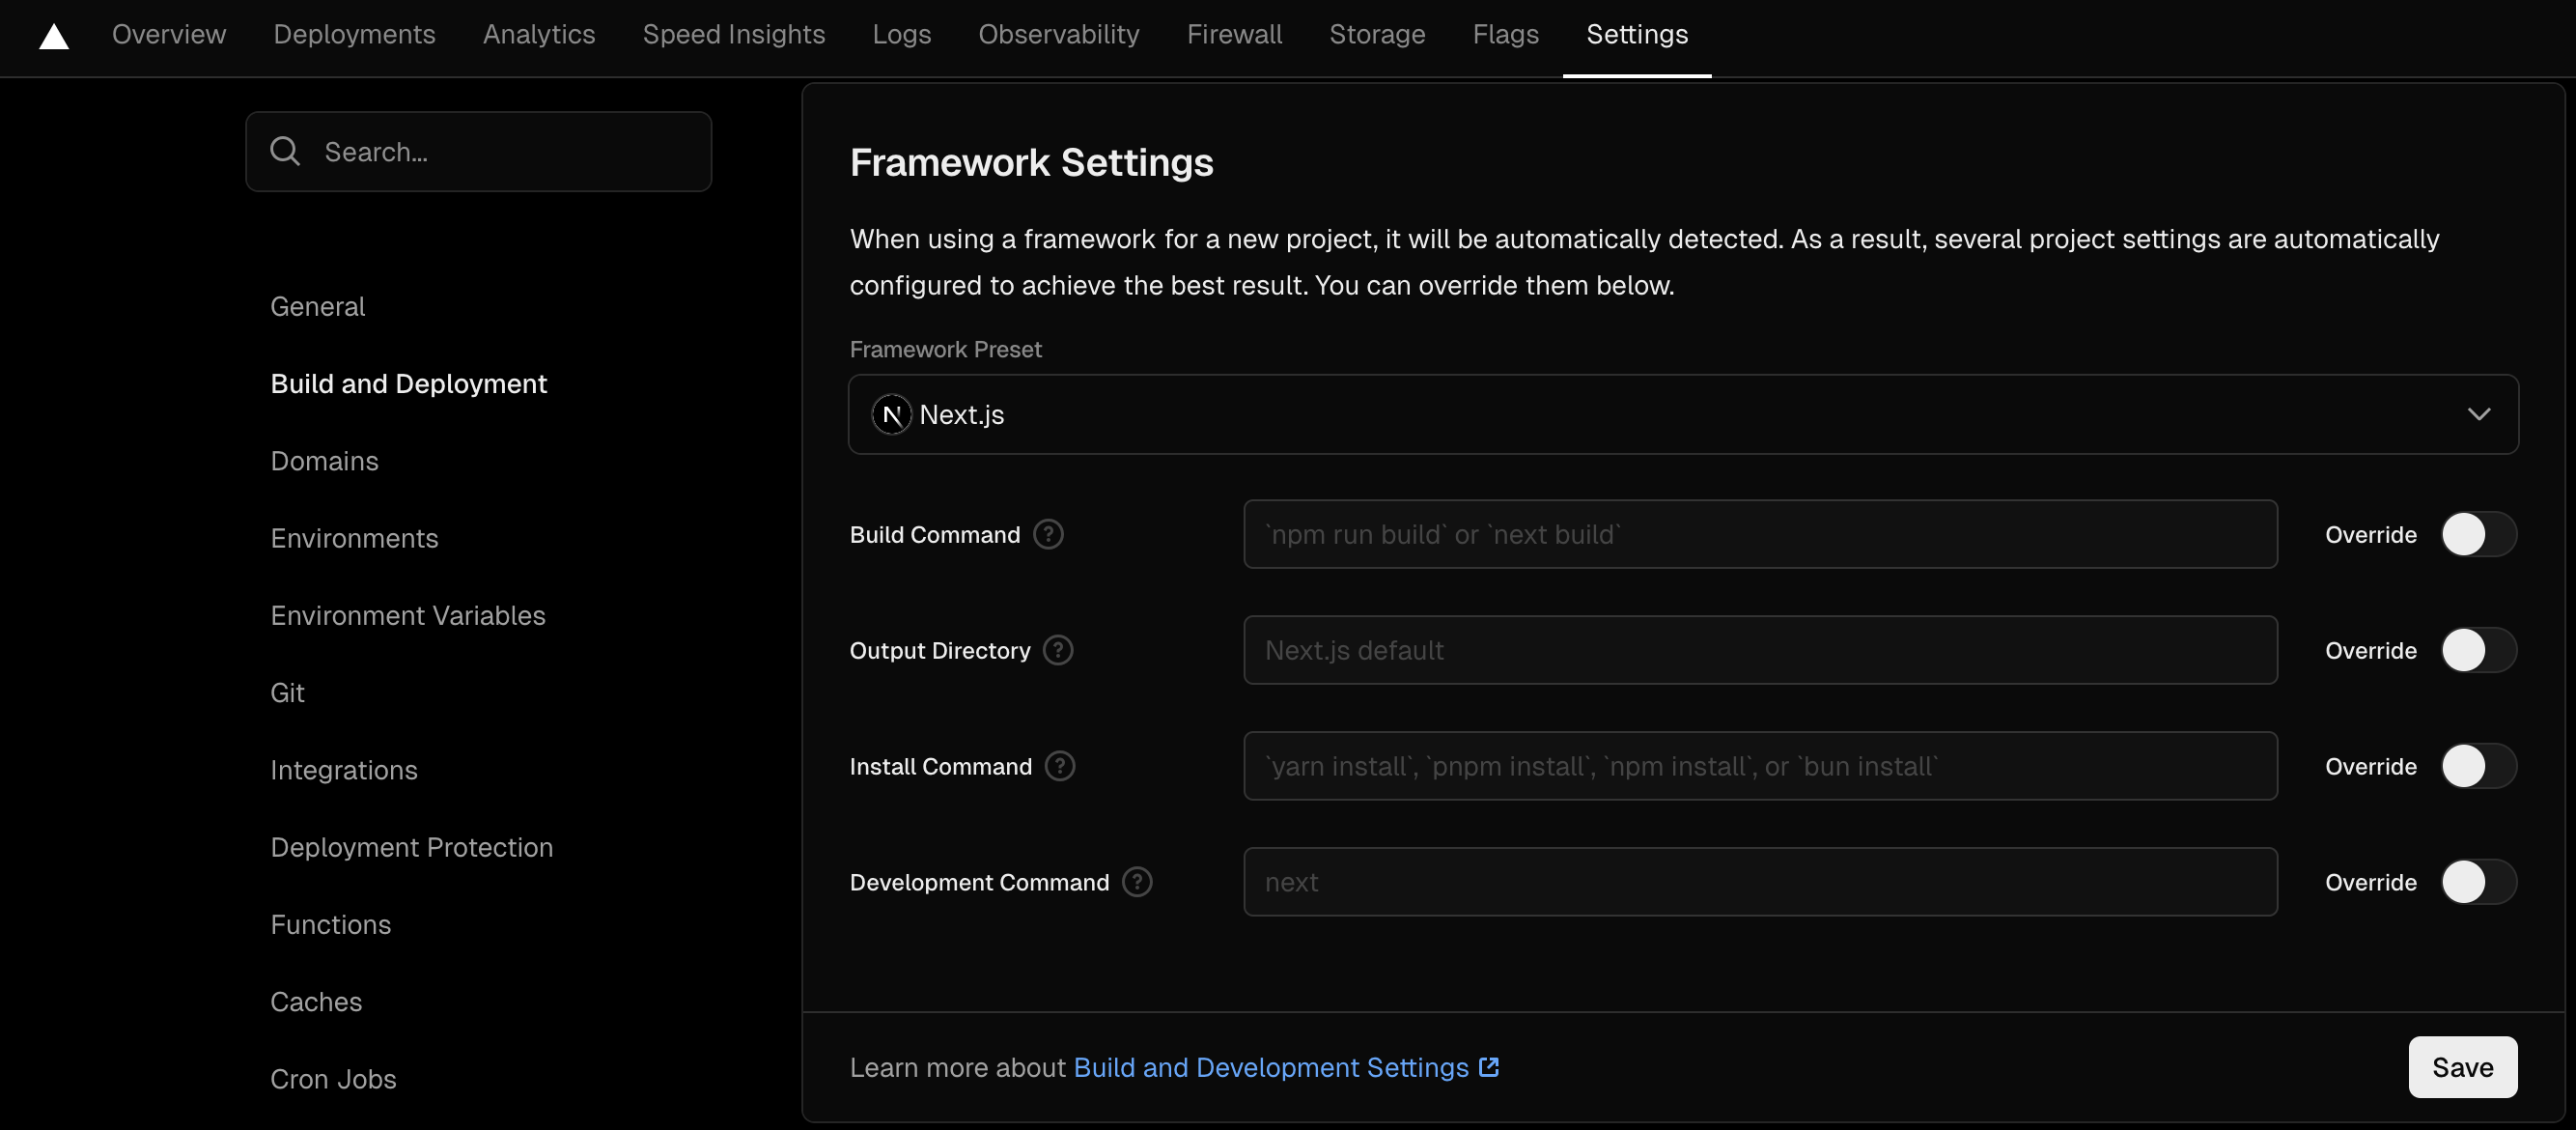
This isolation allows you to test data and schema changes safely in each pull request. To apply schema changes automatically, add migration commands to your Vercel build configuration:
-
Go to Vercel Dashboard → Settings → Build and Deployment Settings
-
Enable Override and add your build commands, including migrations, for example:
Bash npx prisma generate && npx prisma migrate deploy && npm run build
This ensures schema changes in your commits are applied to each preview deployment's database branch.
Managing the integration
Section titled “Managing the integration”Environment variables
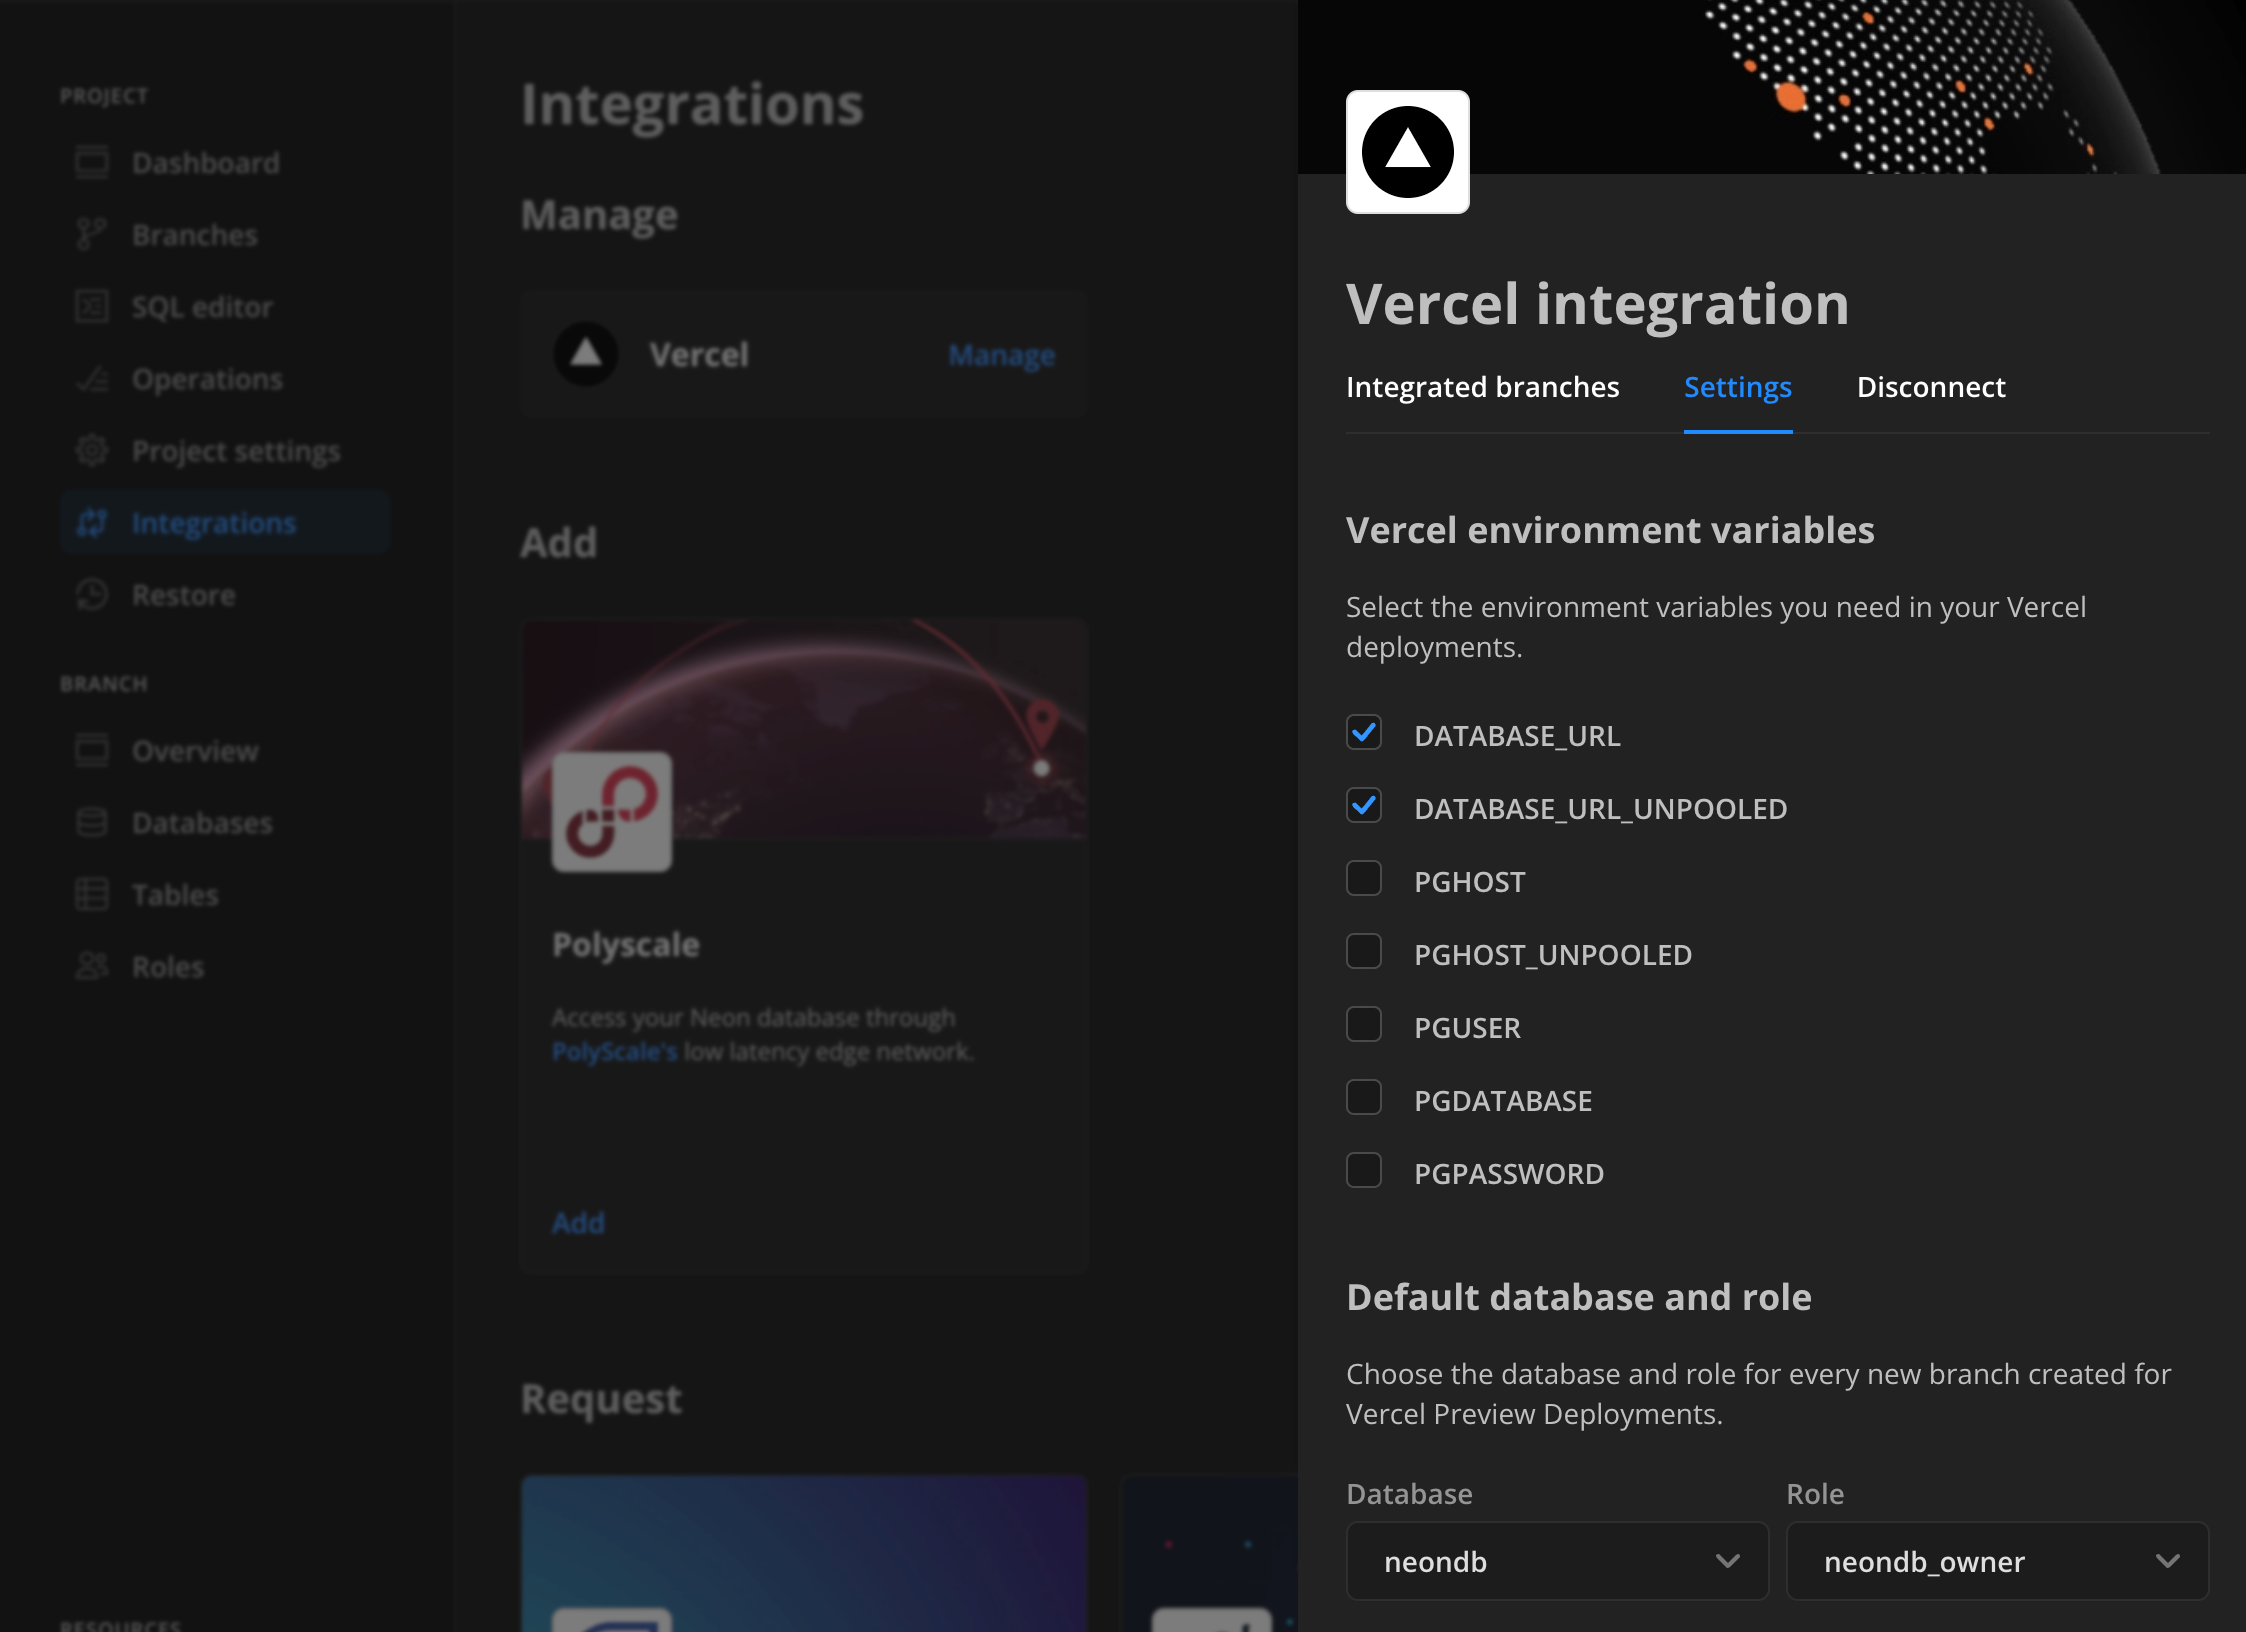
Section titled “Environment variables”The integration sets both modern (DATABASE_URL, DATABASE_URL_UNPOOLED) and legacy PostgreSQL variables (POSTGRES_URL, PGHOST, etc.) for Production and Development environments. Preview variables are injected dynamically per deployment.
DATABASE_URL: Pooled connection (recommended for most applications)DATABASE_URL_UNPOOLED: Direct connection (for tools requiring direct database access)NEON_AUTH_BASE_URL,VITE_NEON_AUTH_URL: Managed Better Auth endpoints (automatically set when Managed Better Auth is enabled on production branch)
To customize which variables are used:
- Go to Neon Console → Integrations → Manage → Settings
- Select the variables you want (for example,
PGHOST,PGUSER, etc.) - Click Save changes
Password rotation behavior
Section titled “Password rotation behavior”When you rotate the selected role password in Neon, the integration automatically syncs updated credentials to Vercel environment variables for connected projects.
If deployments still use older credentials, open Neon Console → Integrations → Manage → Settings and click Save changes to force a resync.
Branch cleanup
Section titled “Branch cleanup”Automatic cleanup (recommended): Enable Automatically delete obsolete Neon branches during setup to remove preview branches automatically when the corresponding Git branch is deleted. Cleanup runs the next time a preview deployment is created.
Unlike the Vercel-Managed Integration, this cleanup is not affected by Vercel's deployment retention policies. For a full comparison and additional cleanup options, see Managing Vercel preview branch cleanup.
Manual cleanup: If needed, you can delete branches manually:
- Individual branches: Neon Console → Integrations → Manage → Branches → trash icon
- Bulk delete: Use Delete all in the same interface
- API/CLI: Use Neon CLI or API for programmatic cleanup
Important cleanup considerations
Section titled “Important cleanup considerations”- Don't rename branches: Renaming either the Git branch or Neon branch breaks name-matching logic and may cause unintended deletions
- Avoid child branches: Creating child branches on preview branches prevents automatic deletion
- Role dependency: The integration depends on the selected role; removing it will break the integration
Disconnect integration
Section titled “Disconnect integration”To disconnect the integration: Neon Console → Integrations → Manage → Disconnect. This stops creating new preview branches but doesn't remove existing branches or the integration from Vercel.
Limitations
Section titled “Limitations”- One-to-one relationship: Each Neon project connects to exactly one Vercel project
- Integration exclusivity: Cannot coexist with the Vercel-Managed Integration in the same Vercel project
- Role dependency: Integration requires the selected PostgreSQL role to remain active
Next steps
Section titled “Next steps”After Installation
Section titled “After Installation”0%
-
Create a feature branch and push changes to verify preview deployments work correctly
-
Add migration commands to Vercel's build settings if using an ORM like Prisma
-
Enable automatic cleanup or establish a manual cleanup process
-
Customize environment variables
Review and adjust which database variables are injected into your deployments
Troubleshooting
Section titled “Troubleshooting”Environment variable conflicts
Section titled “Environment variable conflicts”If you see "Failed to set environment variables" during setup, remove conflicting variables in Vercel first:
- Go to Vercel → Settings → Environment Variables
- Remove or rename existing
DATABASE_URL,PGHOST,PGUSER,PGDATABASE, orPGPASSWORDvariables - Retry the integration setup
Integration stops working
Section titled “Integration stops working”Issue: Preview branches no longer created Cause: The PostgreSQL role selected during setup was deleted Solution: Reinstall the integration with a valid role, or change the role in Neon Console → Integrations → Manage → Settings
Need help?
Section titled “Need help?”Join our Discord Server to ask questions or see what others are doing with Neon. For paid plan support options, see Support.