Replicate data with Airbyte
Neon's logical replication feature allows you to replicate data from your Lakebase Postgres database to external destinations. Airbyte is an open source data integration platform that moves data from ...
Neon's logical replication feature allows you to replicate data from your Lakebase Postgres database to external destinations.
Airbyte is an open-source data integration platform that moves data from a source to a destination system. Airbyte offers a large library of connectors for various data sources and destinations.
In this guide, you will learn how to define your Lakebase Postgres database as a data source in Airbyte so that you can stream data to one or more of Airbyte's supported destinations.
Prerequisites
Section titled “Prerequisites”- An Airbyte account
- A Neon account
- Read the important notices about logical replication in Neon before you begin
Prepare your source Neon database
Section titled “Prepare your source Neon database”This section describes how to prepare your source Neon database (the publisher) for replicating data to your destination Neon database (the subscriber).
Enable logical replication in Neon
Section titled “Enable logical replication in Neon”To enable logical replication in Neon:
- Select your project in the Neon Console.
- On the Neon Dashboard, select Settings.
- Select Postgres, then Logical replication.
- Click Enable to enable logical replication.
You can verify that logical replication is enabled by running the following query from the Neon SQL Editor:
SHOW wal_level;
 wal_level
-----------
 logical
Create a Postgres role for replication
Section titled “Create a Postgres role for replication”It's recommended that you create a dedicated Postgres role for replicating data. The role must have the REPLICATION privilege. The default Postgres role created with your Neon project and roles created using the Neon CLI, Console, or API are granted membership in the neon_superuser role, which has the required REPLICATION privilege.
The following CLI command creates a role. To view the CLI documentation for this command, see Neon CLI commands — roles
neon roles create --name replication_userTo create a role in the Neon Console:
- Navigate to the Neon Console.
- Select a project.
- Select your branch from the project/branch menu at the top of the sidebar.
- Under Postgres database, select Roles.
- Click Add Role.
- In the role creation dialog, specify a role name.
- Click Create. The role is created, and you are provided with the password for the role.
The following Neon API method creates a role. To view the API documentation for this method, refer to the Neon API Reference.
curl 'https://console.neon.tech/api/v2/projects/{project_id}/branches/{branch_id}/roles' \
  -H 'Accept: application/json' \
  -H "Authorization: Bearer $NEON_API_KEY" \
  -H 'Content-Type: application/json' \
  -d '{
  "role": {
    "name": "replication_user"
  }
}' | jq
Replace
{project_id}and{branch_id}with your actual Neon project and branch IDs, and set theNEON_API_KEYenvironment variable with your Neon API key.
Grant schema access to your Postgres role
Section titled “Grant schema access to your Postgres role”If your replication role does not own the schemas and tables you are replicating from, make sure to grant access. For example, the following commands grant access to all tables in the public schema to Postgres role replication_user:
GRANT USAGE ON SCHEMA public TO replication_user;
GRANT SELECT ON ALL TABLES IN SCHEMA public TO replication_user;
ALTER DEFAULT PRIVILEGES IN SCHEMA public GRANT SELECT ON TABLES TO replication_user;
Granting SELECT ON ALL TABLES IN SCHEMA instead of naming the specific tables avoids having to add privileges later if you add tables to your publication.
Create a replication slot
Section titled “Create a replication slot”Airbyte requires a dedicated replication slot. Only one source should be configured to use this replication slot.
Airbyte uses the pgoutput plugin in Postgres for decoding WAL changes into a logical replication stream. To create a replication slot called airbyte_slot that uses the pgoutput plugin, run the following command on your database using your replication role:
SELECT pg_create_logical_replication_slot('airbyte_slot', 'pgoutput');airbyte_slot is the name assigned to the replication slot. You will need to provide this name when you set up your Airbyte source.
Create a publication
Section titled “Create a publication”Perform the following steps for each table you want to replicate data from:
-
Add the replication identity (the method of distinguishing between rows) for each table you want to replicate:
SQL ALTER TABLE <table_name> REPLICA IDENTITY DEFAULT;In rare cases, if your tables use data types that support TOAST or have very large field values, consider using
REPLICA IDENTITY FULLinstead:SQL ALTER TABLE <table_name> REPLICA IDENTITY FULL; -
Create the Postgres publication. Include all tables you want to replicate as part of the publication:
SQL CREATE PUBLICATION airbyte_publication FOR TABLE <tbl1, tbl2, tbl3>;The publication name is customizable. Refer to the Postgres docs if you need to add or remove tables from your publication.
Create a Postgres source in Airbyte
Section titled “Create a Postgres source in Airbyte”-
From your Airbyte Cloud account, select Sources from the left navigation bar, search for Postgres, and then create a new Postgres source.
-
Enter the connection details for your Neon database. You can find your database connection details by clicking the Connect button in the Console nav to open the Connect to your branch modal.
For example, given a connection string like this:
Bash postgresql://alex:AbC123dEf@ep-cool-darkness-123456.us-east-2.aws.neon.tech/dbname?sslmode=require&channel_binding=requireEnter the details in the Airbyte Create a source dialog as shown below. Your values will differ.
- Host: ep-cool-darkness-123456.us-east-2.aws.neon.tech
- Port: 5432
- Database Name: dbname
- Username: replication_user
- Password: AbC123dEf
-
Under Optional fields, list the schemas you want to sync. Schema names are case-sensitive, and multiple schemas may be specified. By default,
publicis the only selected schema. -
Select an SSL mode. You will most frequently choose
requireorverify-ca. Both of these options always require encryption. Theverify-camode requires a certificate. Refer to Connect securely for information about the location of certificate files you can use with Neon. -
Under Advanced:
- Select Read Changes using Write-Ahead Log (CDC) from available replication methods.
- In the Replication Slot field, enter the name of the replication slot you created previously:
airbyte_slot. - In the Publication field, enter the name of the publication you created previously:
airbyte_publication.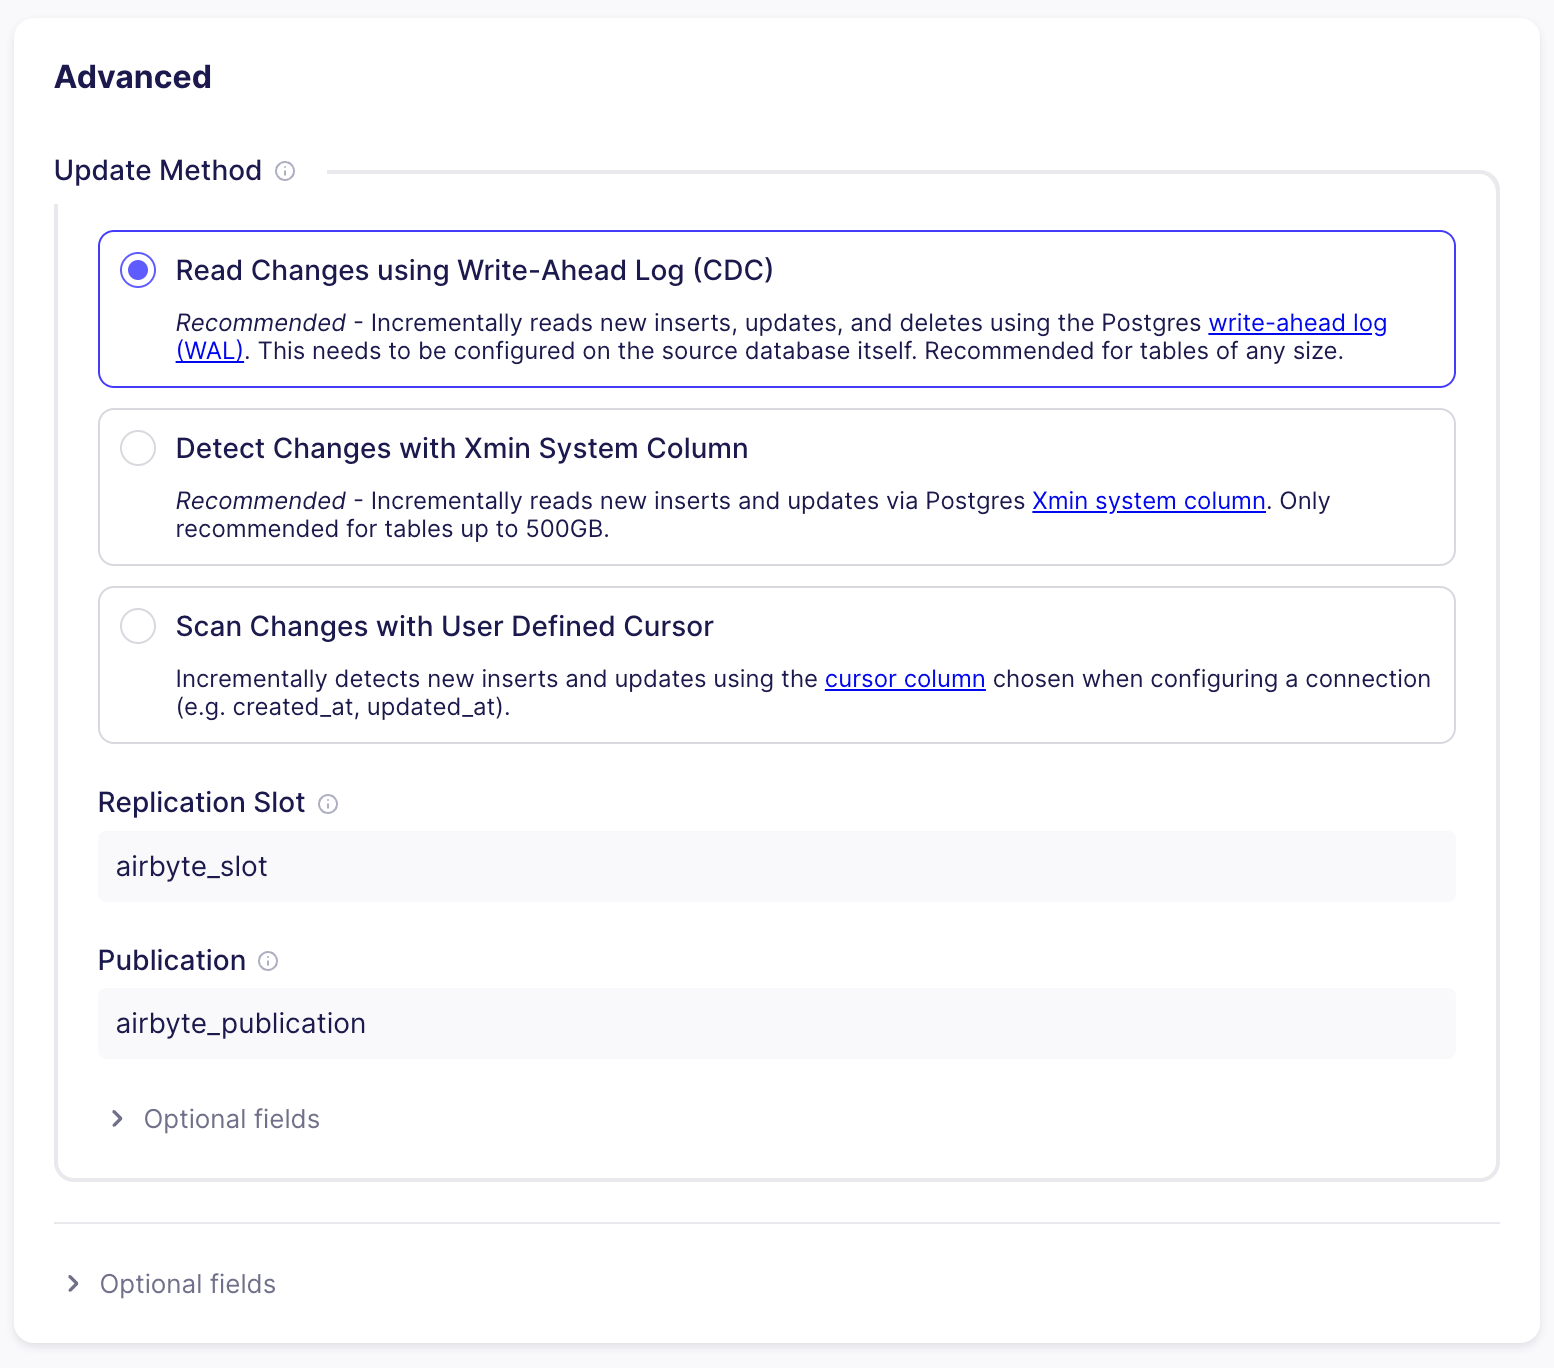
Allow inbound traffic
Section titled “Allow inbound traffic”If you are on Airbyte Cloud, and you are using Neon's IP Allow feature to limit IP addresses that can connect to Neon, you will need to allow inbound traffic from Airbyte's IP addresses. You can find a list of IPs that need to be allowlisted in the Airbyte Security docs. For information about configuring allowed IPs in Neon, see Configure IP Allow.
Complete the source setup
Section titled “Complete the source setup”To complete your source setup, click Set up source in the Airbyte UI. Airbyte will test the connection to your database. Once this succeeds, you've successfully configured an Airbyte Postgres source for your Neon database.
Configure a destination
Section titled “Configure a destination”To complete your data integration setup, you can now add one of Airbyte's many supported destinations, such as Snowflake, BigQuery, or Kafka, to name a few. After configuring a destination, you'll need to set up a connection between your Neon source database and your chosen destination. Refer to the Airbyte documentation for instructions:
References
Section titled “References”- What is an ELT data pipeline?
- Logical replication - PostgreSQL documentation
- Publications - PostgreSQL documentation
Need help?
Section titled “Need help?”Join our Discord Server to ask questions or see what others are doing with Neon. For paid plan support options, see Support.