Replicate data with Stacksync
Neon's logical replication feature allows you to replicate data from your Lakebase Postgres database to external destinations. Stacksync connects databases with CRMs, ERPs, and other systems using rea...
Neon's logical replication feature allows you to replicate data from your Lakebase Postgres database to external destinations.
Stacksync connects databases with CRMs, ERPs, and other systems using real-time, two-way sync. In this guide, you will configure Stacksync to replicate data from your Lakebase Postgres database to a supported destination.
Prerequisites
Section titled “Prerequisites”- A Stacksync account
- A Neon account
- Read the important notices about logical replication in Neon before you begin
Prepare your Neon database
Section titled “Prepare your Neon database”Enable logical replication in Neon
Section titled “Enable logical replication in Neon”To enable logical replication in Neon:
- Select your project in the Neon Console.
- On the Neon Dashboard, select Settings.
- Select Postgres, then Logical replication.
- Click Enable to enable logical replication.
You can verify that logical replication is enabled by running the following query from the Neon SQL Editor:
SHOW wal_level;
 wal_level
-----------
 logical
Create a Postgres role for replication
Section titled “Create a Postgres role for replication”It is recommended that you create a dedicated Postgres role for replicating data. The role must have the REPLICATION privilege. The default Postgres role created with your Neon project and roles created using the Neon CLI, Console, or API are granted membership in the neon_superuser role, which has the required REPLICATION privilege.
The following CLI command creates a role. To view the CLI documentation for this command, see Neon CLI commands — roles
neon roles create --name replication_userTo create a role in the Neon Console:
- Navigate to the Neon Console.
- Select a project.
- Select your branch from the project/branch menu at the top of the sidebar.
- Under Postgres database, select Roles.
- Click Add Role.
- In the role creation dialog, specify a role name, such as
replication_user. - Click Create. The role is created, and you are provided with the password for the role.
The following Neon API method creates a role. To view the API documentation for this method, refer to the Neon API Reference.
curl 'https://console.neon.tech/api/v2/projects/{project_id}/branches/{branch_id}/roles' \
  -H 'Accept: application/json' \
  -H "Authorization: Bearer $NEON_API_KEY" \
  -H 'Content-Type: application/json' \
  -d '{
  "role": {
    "name": "replication_user"
  }
}' | jq
Replace
{project_id}and{branch_id}with your actual Neon project and branch IDs, and set theNEON_API_KEYenvironment variable with your Neon API key.
Grant schema access to your Postgres role
Section titled “Grant schema access to your Postgres role”If your replication role does not own the schemas and tables you are replicating from, make sure to grant access. For example, the following commands grant access to all tables in the public schema to Postgres role replication_user:
GRANT USAGE ON SCHEMA public TO replication_user;
GRANT SELECT ON ALL TABLES IN SCHEMA public TO replication_user;
ALTER DEFAULT PRIVILEGES IN SCHEMA public GRANT SELECT ON TABLES TO replication_user;
Granting SELECT ON ALL TABLES IN SCHEMA instead of naming the specific tables avoids having to add privileges later if you add tables to your publication.
Create a publication
Section titled “Create a publication”Create the Postgres publication. Include all tables you want to replicate as part of the publication:
CREATE PUBLICATION stacksync_pub FOR TABLE <tbl1, tbl2, tbl3>;The publication name is customizable. Refer to the Postgres docs if you need to add or remove tables from your publication.
Create a Postgres connection in Stacksync
Section titled “Create a Postgres connection in Stacksync”- Log in to your Stacksync account.
- On the All Resources page, click Create Resource.
- Under Jump right in, create a resource, click Connections.
- Select Postgres.
- Enter your Neon database connection details. Click Connect in the Console nav, select the replication role you created earlier (not the default
neondb_ownerrole), and click Copy snippet. Use a direct connection string; the hostname must not include-pooler. Logical replication is not compatible with connection poolers. - If you have disabled Allow traffic via the public internet under Networking in Neon's Settings, select I confirm I have allowlisted these Stacksync IPs on my side in Stacksync, and copy the IP addresses into your trusted IP addresses in Neon's settings under Networking.
- In Stacksync, click Next.
- Enter a name for Connection Name.
- Click Create.
Create a connection to your destination in Stacksync
Section titled “Create a connection to your destination in Stacksync”Skip this step if you already have a destination connection configured in Stacksync.
-
Log in to your Stacksync account.
-
On the All Resources page, click Create Resource.
-
Under Jump right in, create a resource, click Connections.
-
Select the connector for your destination from one of Stacksync's connectors.
-
Follow the prompt in the Configure connection popup.
-
If you have disabled public internet access in Neon, allowlist the Stacksync IPs as described in the Create a Postgres connection in Stacksync section above.
-
In Stacksync, click Next.
-
Enter a name for Connection Name.
-
Click Create.
Create a sync
Section titled “Create a sync”Skip this step if you already have a sync configured.
-
Log in to your Stacksync account.
-
On the All Resources page, click Create Resource.
-
Under Jump right in, create a resource, click Syncs.
-
Enter a Sync Name.
-
Select Postgres and choose the saved connection you created in the Create a Postgres connection in Stacksync section.
-
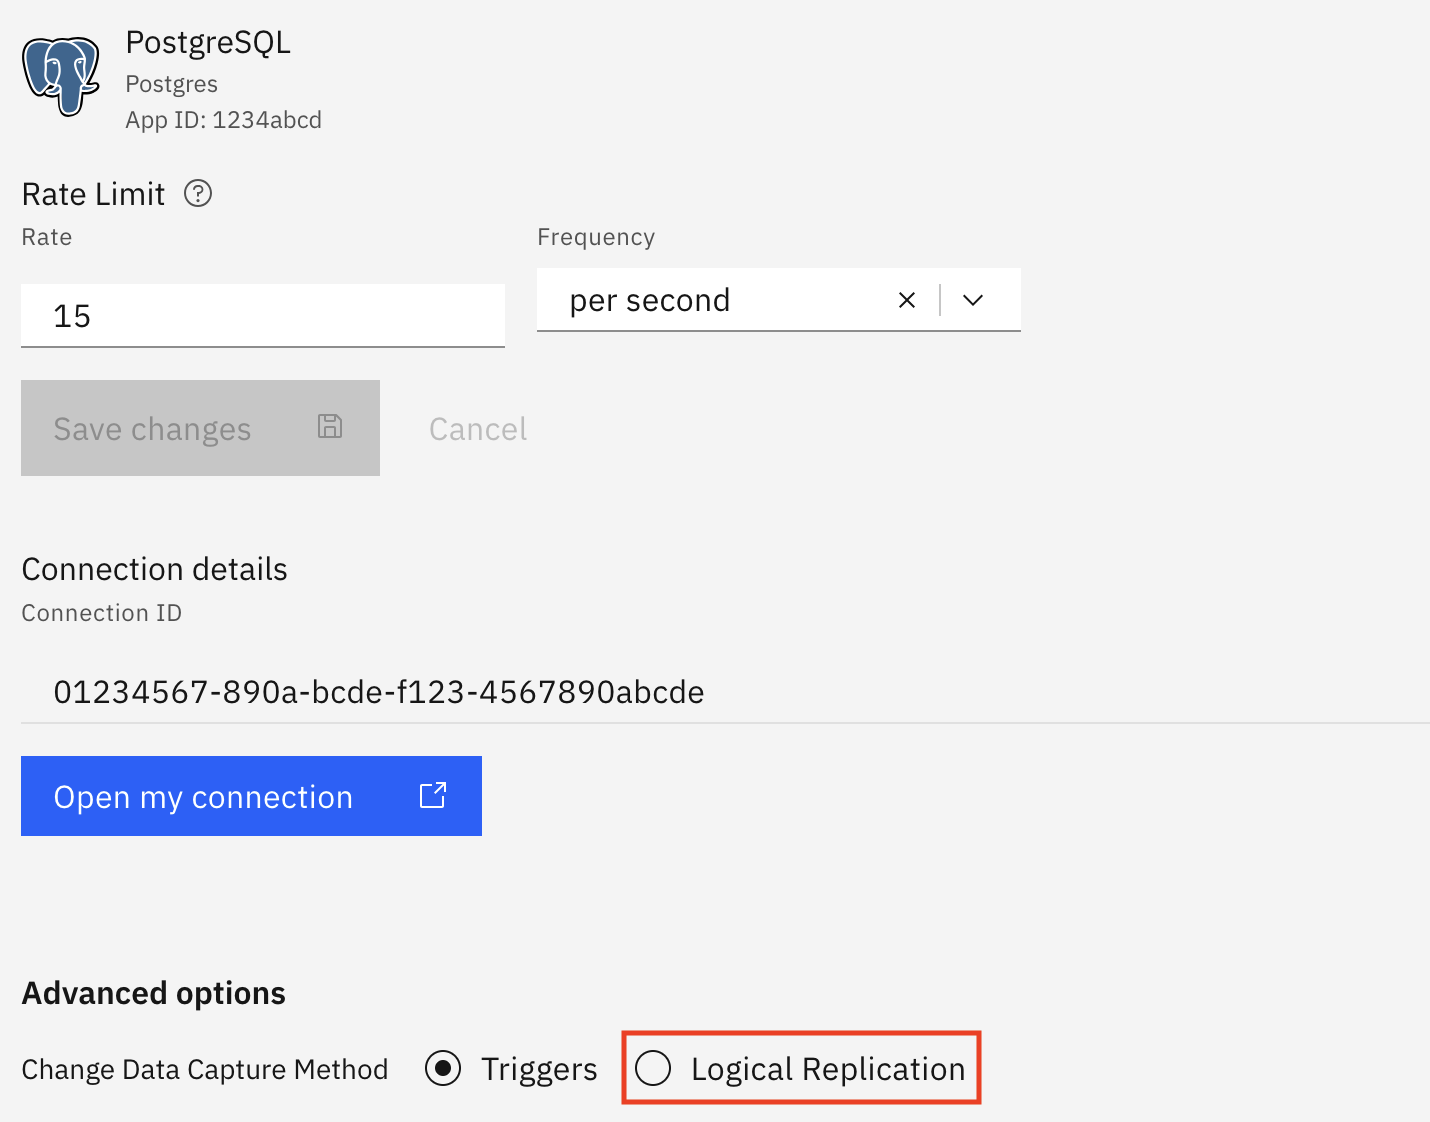
On the schema screen, click the Postgres connection and select Logical replication under Change Data Capture Method.
-
Click one of the apps you have created a connection for in the Create a connection to your destination in Stacksync section.
-
Click Link Tables.
-
Select a table you would like to sync under Postgres.
-
Select a table you would like to sync the data to under your destination.
-
Select if you would like the sync to be one-way or two-way.
-
Repeat from the previous step for any additional tables you would like to link.
-
Click Map Columns to configure which columns to sync and the sync direction for each. Stacksync auto-maps columns by default; select or deselect columns as needed. See Stacksync's two-way sync docs for details on field selection and sync direction.
-
Click Create.
-
On the next page, turn on the sync by clicking the toggle in the top right.
-
Optionally, update the Data sync frequency under Settings.
References
Section titled “References”Need help?
Section titled “Need help?”Join our Discord Server to ask questions or see what others are doing with Neon. For paid plan support options, see Support.